Reality Check…

My company has announced some extremely severe cutbacks despite the fact that we are profitable. Wall Street demands more. Gotta pay out those executive bonuses afterall.

Anyway, shortly they are going to lay off somewhere upwards of 500 workers…that’s an extremely healthy percentage of our remaining workforce.

In addition, for any remaining behind they’ve reneged on our retirement benefits…essentially “pulling out” alltogther and ending their participation. They’ve also said “no raises” for the rank-and-file and are now viewing employees as a revenue source by charging us for parking and giving us the privilage of paying for communications devices/plans they require us to carry.

Goes to show you just what over 24 years of loyal service will get you…

I’ll leave my feelings out of this at the moment. What I have to do is understand and prepare for the impact of these events on my and my wife’s lives.

Even IF I survive the coming round of cuts…

If.

Anyway, we’ve decided that now is a good time to accumulate a bunch of cash. We are drastically cutting our budgets for anything we can, including the work on the Old Vic.

How will this effect the house project?

Well, simple. We will continue to enjoy our house, and our project focus will shift to the more labor/time intensive projects that don’t need a lot of money spent on materials. Clean up, chimney removal, foundation work, windows…all of those need done and don’t cost a lot as we are doing the labor.

The utility room…which was next up on the list, will be postponed for now. Cabinets, plumbing, and appliances are on the “spendy” list.

We’ll keep you posted.

CUAgain,
Daniel Meyer

Posted in Miscellaneous | Leave a comment

Cutting Corners

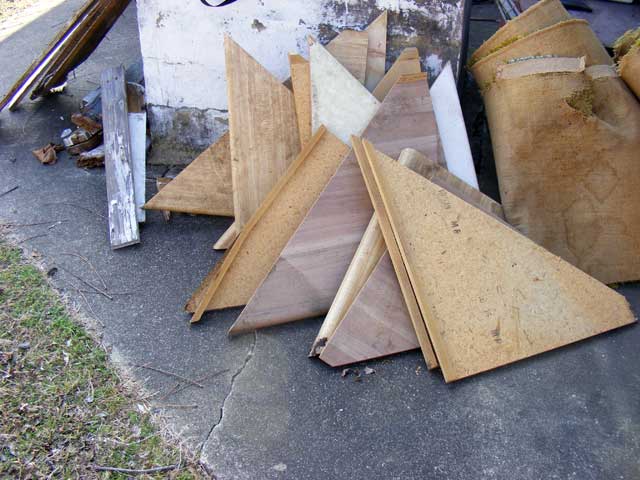
Found about 250 pounds of these in the attic at the Old Vic…the cut off corners from preformed laminate countertop…probably early 80’s vintage by the patterns. These are the remnants when you cut two pieces to make a corner countertop. They are pretty much completely useless for anything.

Cutting corners

Cutting corners

There are about 10 different patterns…and they weren’t used in this house…and they are heavy…and they were carted up two flights of stairs and stowed deep in the recesses of a somewhat-hard-to-get-to attic.

I’ve absolutely no idea why…

CUAgain,
Daniel Meyer

Posted in Wierd and Wonderful | Leave a comment

So…who were we, that wrought such…brilliance?

So, who did it?

The 70’s. Shag carpet, brilliant hues. 8-tracks. Gold medallions. Shimmering nylon shirts.

Nobody ever admits to buying such things…these artifacts from the 70’s…yet we find them everywhere. Somebody must have looked at these things at one time and thought, “Hey, that looks great! I’ll buy some!”

Those of us that have been around a while, and can be totally honest with ourselves might, in the deepest, darkest night, admit to having bought such things.

Or not.

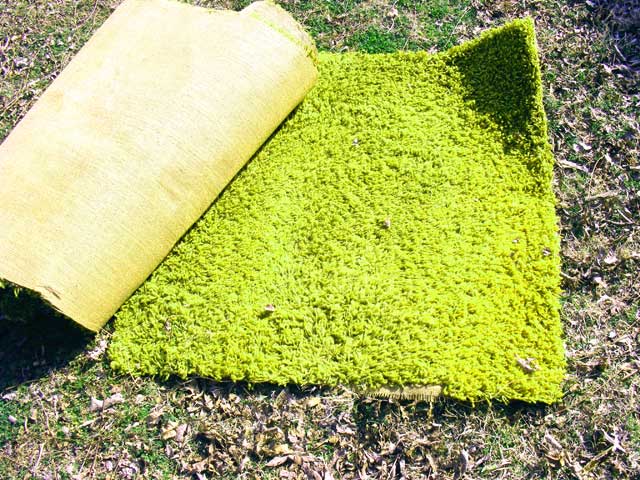
Anyway, we pulled about a 20 x 20 deep pile 70’s carpet out of the upstairs living room this weekend. What place it ever had in a 1902 Queen-Anne Victorian is a matter for future scholars to debate.

It was so old that the backing was rotted, despite having been in dry, controlled conditions. It could be ripped into sections, rolled up, and tossed out a window.

It was, for lack of a better term, brilliant. Perhaps nuclear. Glowing?

Wasn’t 3 Mile Island in the 70’s? Is that how they made this color?

I can’t even imagine a showroom full of this and its brethren colors.

Maybe I saw one…back then…but I don’t remember (that’s my story and I’m sticking too it!)

Even the picture doesn’t do it justice once out in the sun…despite 30 years of dust and grime and only shooting a tiny piece of it, its original color still shone through…completely saturating the CCD in my poor digital camera.

Modern electronics were simply never designed to concieve of such a color…the deep pile…the brilliant green intermixed with the puke yellow…ugh…I may be getting seasick here.

Such colors should only exist deep in the minds of those flying high on the usually freely available chemicals also so prevalent during that period, but here they are, for all the world to see.

Nuclear Carpet...the seventies never looked so good

Nuclear Carpet

It’s hard to describe just how much better the room looks without it…although I may be throwing away this century’s new power source. Wrap this stuff tight enough, shine a black light on it, and I’m sure it will reach critical mass.

Not all treasures of the past should see the light of day…

CUAgain,
Daniel Meyer

Posted in Wierd and Wonderful | 1 Comment

Stairway Windows (part 2)

Alternate title: “Destruction, mayhem, windows.”

Well, after two weekend’s work, $26 worth of lumber, the jigsaw puzzle from hell, $1500 worth of tools (two nail-guns and at least 5 different power-saws were involved), well, I’m right back where I started…about ready to work on the two sashes I walked upstairs to remove in the first place.

Gotta love old houses (I do! I’m not complaining…I LOVE a challenge!)

Another inside view with sills removed.

Another inside view with sills removed.

The construction here is fairly simple…there is a “sub-sill”…a one piece 2×6 that is offset to the outside, angled and notched to fit around the window framing. On top of that is the actual sill…a one-piece 1” thick that fits to the window frames and sits on top of the “sub-sill”…

Inside view with sills removed.

Inside view with sills removed.

The destroyed sub-sill. The actual sills are totally gone...not even enough to make a pattern

The destroyed sub-sill. The actual sills are totally gone...not even enough to make a pattern

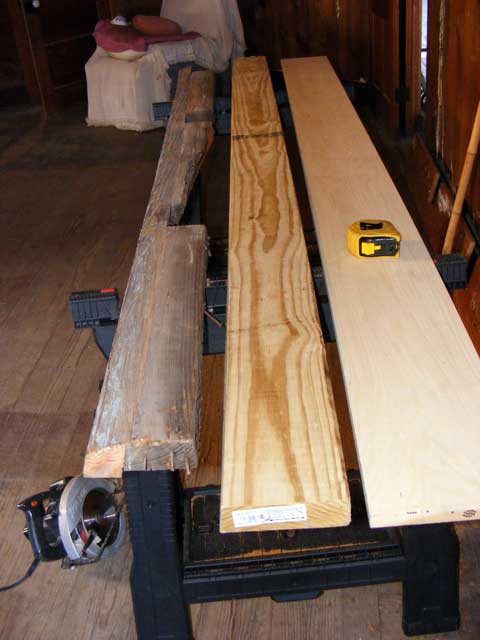
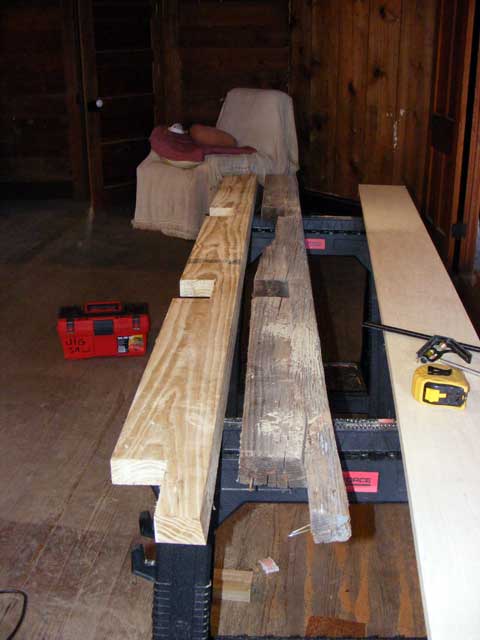
The sub-sill was not salvageable…severely rotted and warped/cracked. The sills themselves were completely gone…rotted to sticks and dust. There wasn’t even enough there to make a pattern. The 2×6 there is to be cut for the sub-sill, the 1×8 is a piece of poplar I’m going to use to make the main sill.

Outside view with sills removed.

Outside view with sills removed.

Since the windows are essentially “swinging free” at the bottom, and the sub-sill determines exact placement as it butts up against the dormer framing, careful measuring was required to get the windows in square as well as spaced correctly. Oh, and lets not forget the entire thing is at a 10 degree angle. “Measure twice and cut once.” didn’t work here…it was more like “Measure 42 times and cut 4 times” as I cut each notch and then completely measured again. I ended up with a perfect fit.

After more than an hour of careful measuring...and squaring up the actual windows...the cut sub-sill

After more than an hour of careful measuring...and squaring up the actual windows...the cut sub-sill

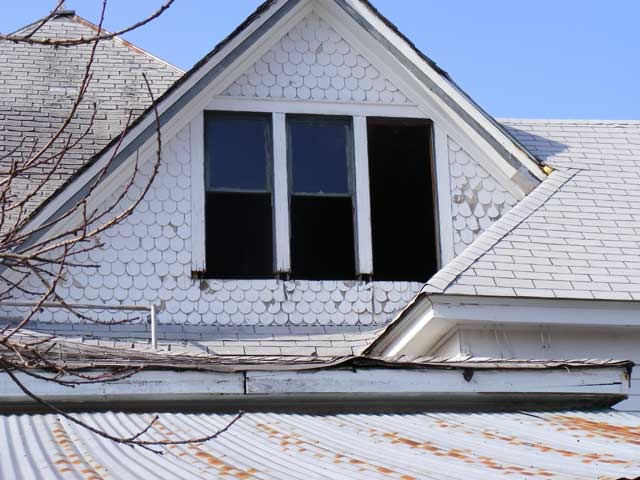
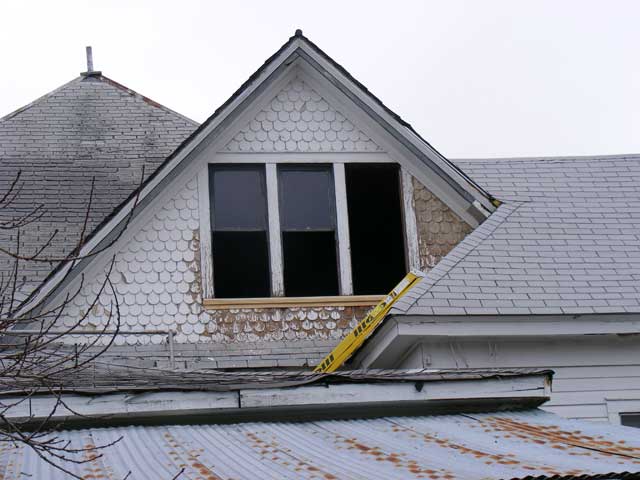
You may note the fish-scale appears to have cancer…changing color on the right side and below the window in the installed picture below.

That’s a story of a jigsaw puzzle on steroids.

Over the years the fish-scale had pulled loose from the under-sheathing…little by little. Repairs had been attempted, but done with short, fat, roofing nails for the most part.

The result was that many of the scales were split, and although they were nailed to each other, the repair nails hadn’t penetrated all the way through to the sheathing. The scales to the right and below the window came free of the house in a sheet.

Imagine a jigsaw puzzle with no picture (all the paint is peeling off), that somebody has lost some of the pieces over the years, cut up/split a bunch of others, pushed them together with pins, and when you poke at it with your finger just to see how bad it is the entire mess crashed 4 feet down on the roof below so it would shatter some more.

Some paint scraping and disassembly, a bunch of puzzling, two hours of careful work with a finishing nailer, and TA-DA! Looks great, will be there the next hundred years, and I’m only missing about three pieces. They are cedar shakes…so I can make replacements for the missing ones fairly easily. Then, more scraping and prime the entire mess.

The new sills installed.

The new sills installed.

So there you have it…I just went up to work on a couple sashes…and after two weekends of work I’m right back where I started…about ready to work on two sashes.

Just to show you what I’m up against…

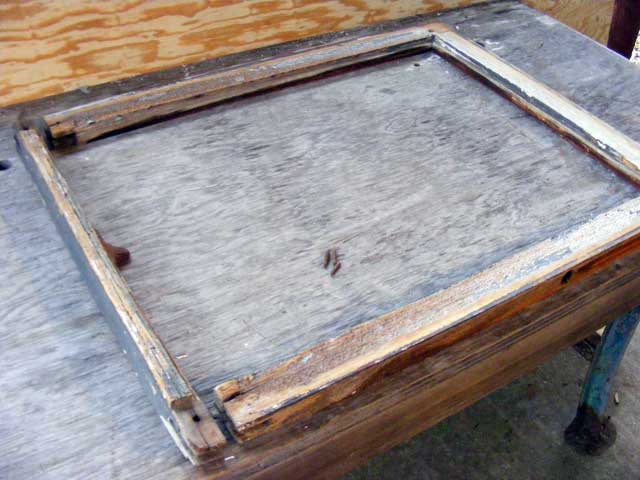
The top sash...all the joints have failed and part of the bead is rotten. Yep, I think I can save it.

The top sash...all the joints have failed and part of the bead is rotten. Yep, I think I can save it.

I’ll be tinkering with that next weekend, as well as working on the priming of that dormer. The weather moved in on us and it was time to move to more “inside” work. When your ladder’s icing up it’s time to go.

CUAgain,
Daniel Meyer

Posted in Carpentry/Structure, Windows | Leave a comment

Stairway Windows (part 1)

Alternate title: “Destruction, mayhem, windows.”

So, at the top of our stairs are a set of three windows. There’s an extra wall in the way of course…doesn’t belong…will be removed later…but gotta build a stairway banister first, etc…

Anyway, these three windows are in the worst condition in the house…long neglect combined with the southeastern exposure have significantly damaged these windows.

I am eliminating the sash weights in this set of windows due to the construction around them (the weight pockets are a complete attic! …the heat/air loss and air penetration for each one of these is significant and difficult to correct here.

Anyway, two ways to go…the spring wound replacements for the pulleys (called “tape balances”), or jamb kits. The tape balances work, but are expensive, and you’re still facing the weather sealing of the window itself

Jamb kits can support the windows AND provide nice weatherstripping.

The simpler jam kits are kind of cool because there is little alteration to the sashes or frames yet I get a tight air seal and window “balancing”. They are also affordable (relatively) and once the trim is in place, unobtrusive.

These for instance: http://www.windowrenu.com

These windows in particular…are “double sash”…as in both sashes move…but the top sash is not “hung”…no weights/pulleys. (not sure why). You can drop the top sash all the way, well, except for the fact the top sashes have all failed and need re-glued and the glass re-glazed…or open the bottom window all the way (it holds up the top sash?). Weird. Not ideal (all the other windows are actually double hung). Not sure how these were actually supposed to operate. There’s no evidence of pins or such to hold up the top sashes.

The jamb kit can fix all this…seems a good fit for the smaller upstairs windows.

But of course, all these windows…I want to be sure…so I ordered ONE…for the worst window in the house…just to test…to see how it’ll work, durability, installation, looks, function, etc… After-all, I can always pull it back out and try the tape balances instead if I want…there are also other, more expensive but “feature-full” jamb kits.

Heh…never got even close to installing it. The exterior sills are completely shot…at some point somebody had screwed tin over the already weathered sills…but no caulk or sealing…so it just managed to make it rot that much more.

Good thing I’m handy.

My Dad and his wife (Hi Jean!) were up this weekend to help. Me and Dad attacked the windows, while Jean and Carey attacked the dust monster that has been living in the second floor for a couple decades.

There’s some truly obnoxious colored deep shag carpet that they removed…when placed in the sun the color was even more…stunning…radioactive even…but that’s subject for yet another post.

Dad and I were just going to remove a set of sashes, install the jamb kit, repair the sashes, prime and caulk and paint the whole mess.

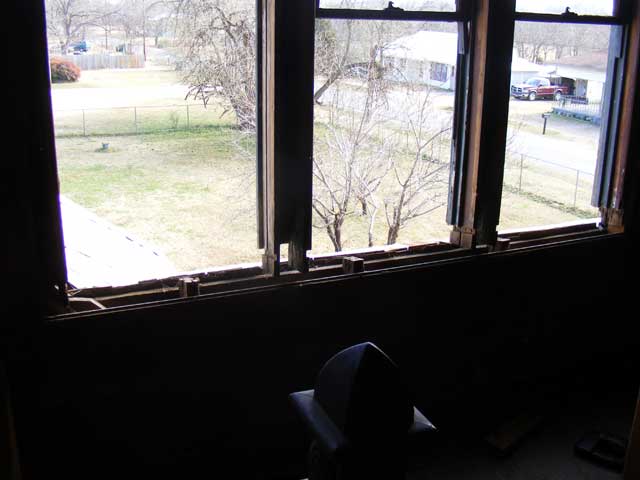
Instead, We’ve removed part of an (extra) wall to get to the set of windows, removed all the sills (internal and external), removed the underlying rotted framing, and then boarded the whole thing up. Enough is enough for one weekend.

The wife must think I’m nuts…she knew I was just headed up to remove a set of sashes…and now we’ve got a 5×7 foot hole in the wall.
I told her the crowbar slipped.

I’ll put it back together next weekend. Gotta find some rather…specific…sized lumber and make some complicated cuts to make the two different, one-piece-but-spans-three-windows-sills and underlying framing.

We did cut one…but there’s a problem in how we measured and though it “would do”, I expect I’ll be doing it over to get it right.

Sigh.

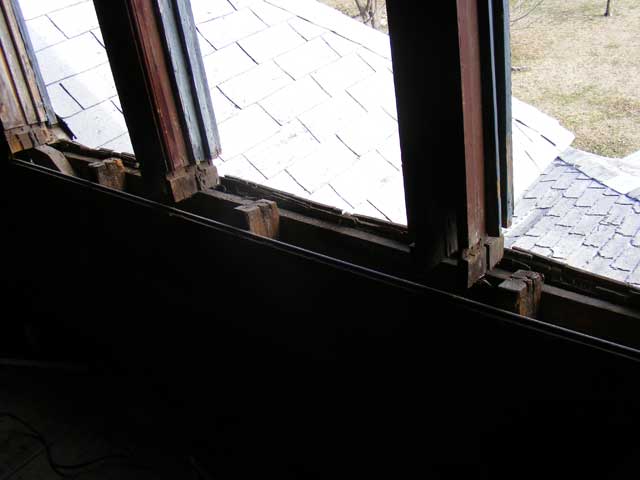
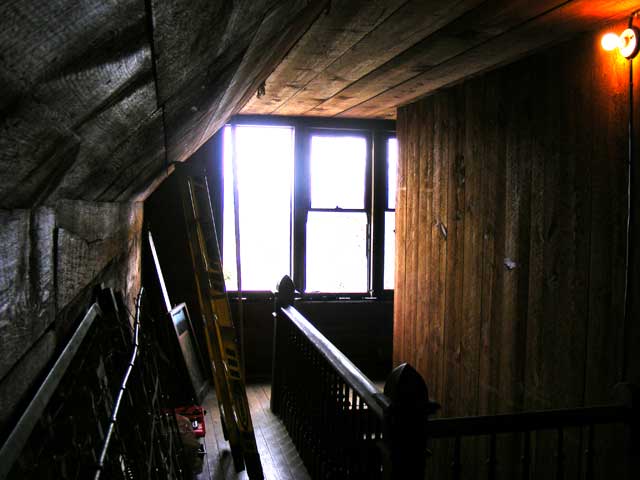
Fortunately the intense back-lighting in this picture disguises the serious destruction we have rendered here…I’ve got a long way to
go before this mess is fixed.

It all started...just wanting to remove a set of sashes...

It all started...just wanting to remove a set of sashes...

Posted in Carpentry/Structure, Windows | Leave a comment

Surprise Blooms

Apparently there are some plants that are somewhat confused at the season…ya know…80 degrees one day, 30 the next, 80 the day after (maybe 20 this week so they say…)

Anyway…some surprise blooms at the Old Vic…came up under the scaffolding whilst I was working on the eave (priming it and reflashing the roof this weekend)…

CUAgain,
Daniel Meyer

Posted in Wierd and Wonderful, Yard | 1 Comment

Porch Eave Repair

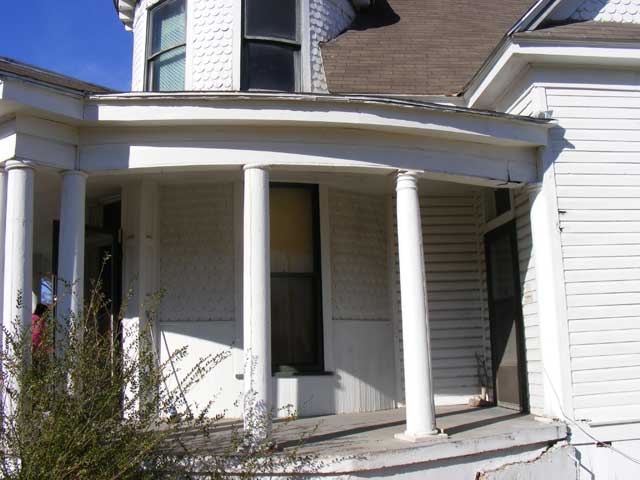
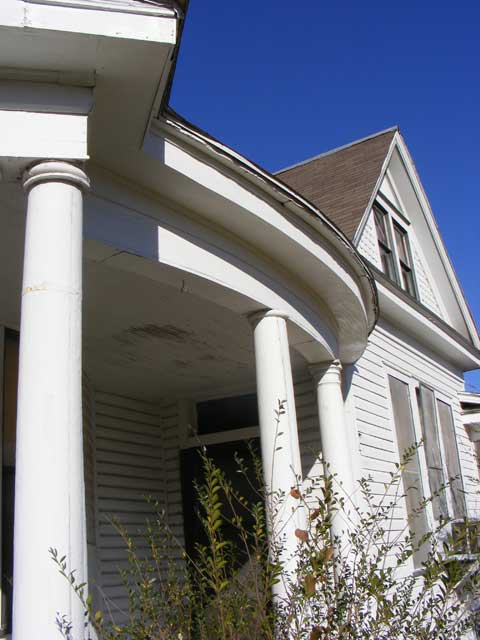
This was a project I was eager to tackle…simply because it’s the most obvious “blemish” on the house, AND it is causing further damage while it sits un-repaired.

This project has it all. Good food, good friends (Hi Mike!), an epic battle with mass quantities of hornets (I won), impressive (even for Texas) weather swings, mass destruction, and “boys with their toys” (I really do like cool tools).

The short of it is, originally there were box/hidden gutters above the roof-line, in the eaves. Over the years leakage and inevitable deterioration significantly damaged the eaves and surrounding area. At some point, the problem gutters were roofed over and some work done to the eave at the porch.

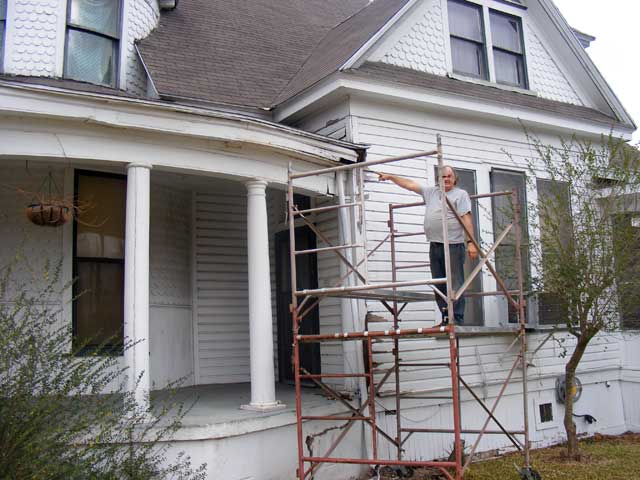
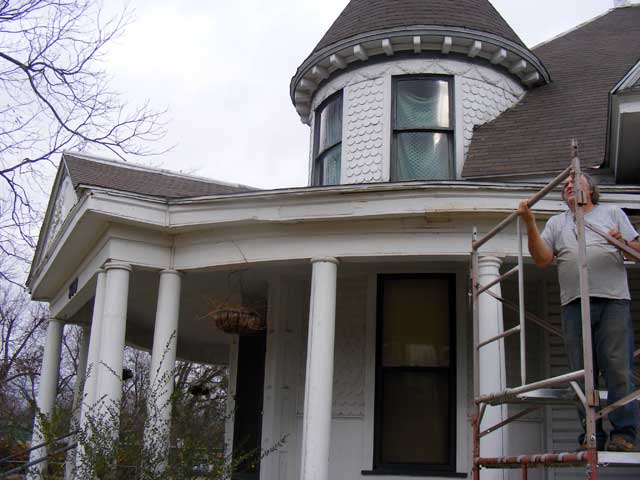
Unfortunately, the “lie” of that roof routes water from the top of the house to the corner (pictured below, my friend Mike is pointing at it). The problem is that the flashing is not correct there, allowing some water to get into the wall, and worse, even in a minor rain, water runs down the side of the house.

The previous repair of the eave also had some issues…overlaps of wood were not quite right, allowing some water penetration and “wicking”. Over the long term, this always leads to damage, even with minor amounts of water.

After all these years, my friend Mike still hasn’t learned to say, “Ur, I’ll be out of town.” when I ask, “What are you doing this weekend?” so he got shanghaied to help with this project.

Actually, he volunteered willingly…and despite me wearing him (and myself) completely out, I think he had fun. I couldn’t have done it without him.

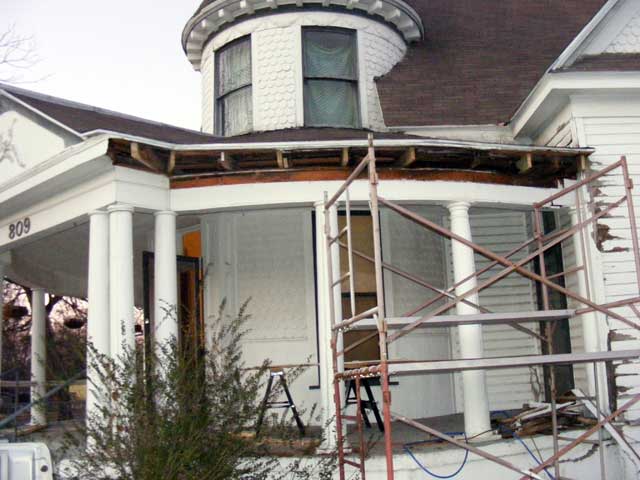
Eave damage

My friend Mike...I think he is suggesting we buy about 50 cans of Great Stuff foam and call it a day

One thing you’ll learn working on buildings…any buildings, not just old ones…is that if you can see damage or a problem, that is only the surface. It will run much deeper than you can see.

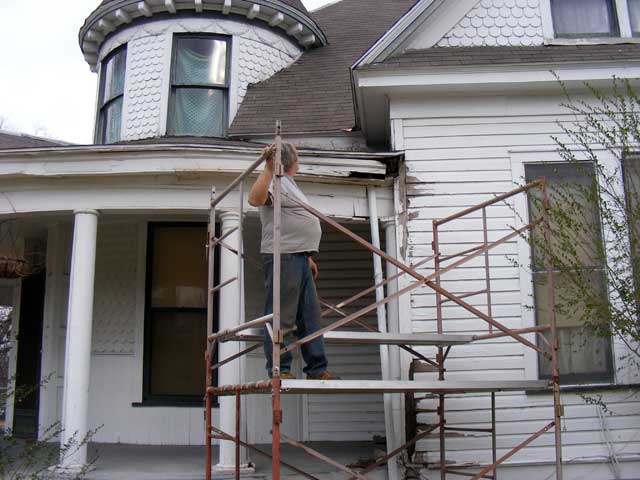
A good view including the damage to the siding.

A good view including the damage to the siding.

The eave needs to be taken apart all the way to the front of the house. Something over 16 feet of it.

eave damage

Another view. This has been repaired before and now needs completely removed and replaced.

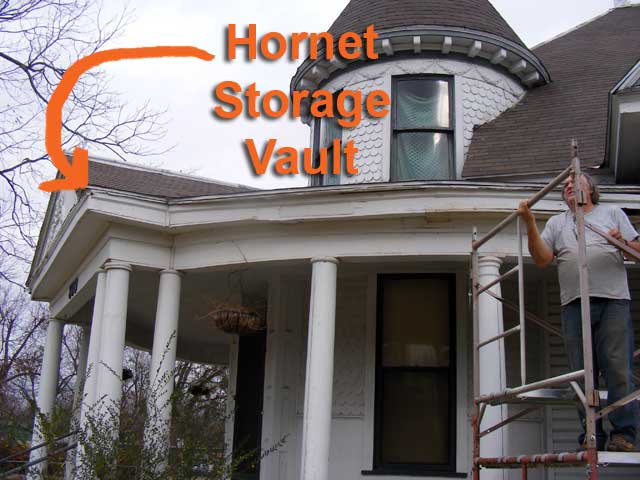
By the way, always be sure to properly store your hornets for the winter.

lways store your hornets properly for the winter

lways store your hornets properly for the winter

Also note, despite the winter, hornets and wasps can be active at any time in Texas. As a for instance, it was 80 degrees as we started this project. 80 degrees in January! Gotta love those Texas winters.

They are never quite where you expect them…really…they could have been in the open/damaged eave area, but were not. There was a small hole in the very corner of the front eave, and the hornets had moved in. I expect they’ve been there for several years, as once we got it apart we found a massive amount of very large nests in there.

Fortunately for us, We had spotted a few of the black and red nasties entering this hole a couple weeks before. I chose a very cold day when I knew they’d all be home, AND they would be completely dormant, and I climbed a ladder and emptied an entire can of hornet/wasp killer into the little hole. It has fume and residual action so I knew that even if I wasn’t hitting the nest directly, it would “do the deed”.

I examined the problem area on a few other days when it was warm enough and found no activity.

So…On to the destruction!

There’s no help for it…you’ve just got to get started. It is always with some reluctance that I take a crowbar to a house…sometimes I worry that I’ll never get to a stopping point…I’ll be left standing there looking at nothing but a pile of sticks and with no idea how to put it back together again, but it has to be done. Between the water and the squirrels, this eave is significantly damaged.

“Shyness” or intimidation keep many very necessary home repairs from ever being attempted. Occasionally, I look at this house and feel a bit intimidated…but “shyness” when attacking a project is one issue I so totally don’t have.

Now we're getting to the meat of the matter.

Now we're getting to the meat of the matter.

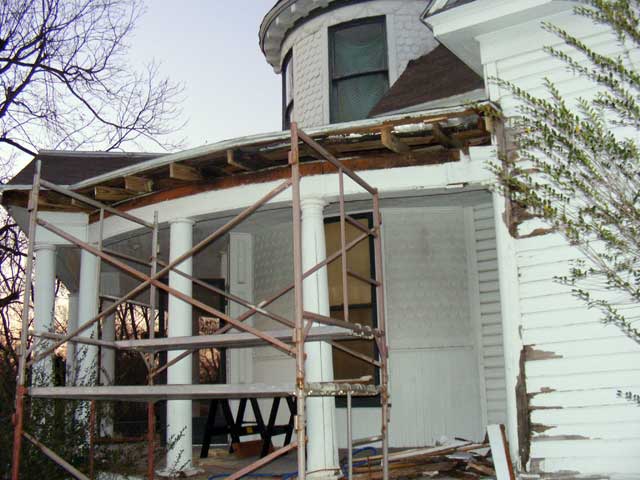
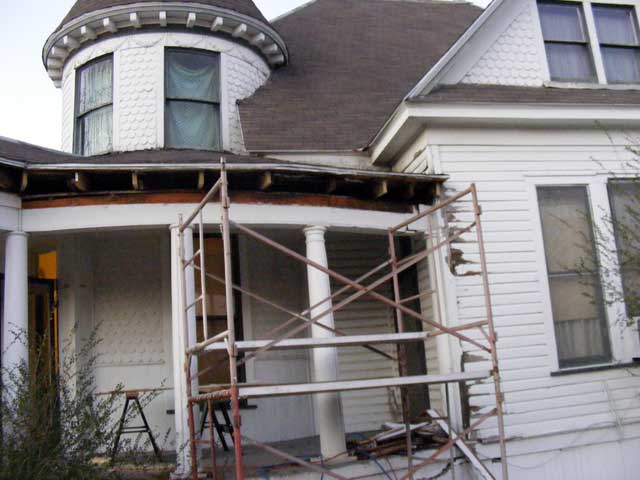
A few hours work…and mass destruction is achieved. Most of this was done with a single crowbar (a Stanley Wonderbar, a truly superb tool of mass destruction). NONE of the removed material is salvageable, in fact, most of it came out in pieces so small that it was not even useful for figuring out how to cut/measure the replacement parts.

The eave apart--Another view

The eave apart--Another view

There’s not a straight line on this thing…this is going to be “interesting” to put back together.

You can see we've cribbed some new ends to the joists.

You can see we've cribbed some new ends to the joists.

It was 80 degrees, sunny, breezy, and balmy when we took this apart. A front came through early the next morning, and we were suddenly faced with overcast and freezing temperatures, as well as a significant north wind for the “put it back together” part.

A 50 degree temperature swing. It happened in a matter of hours. Gotta love those Texas winters, yes?

Well, 100 bucks worth of lumber, 1000 bucks worth of tools. We needed two nail-guns (a framer and a finisher), three saws (table saw, miter/cross-cut saw, and the standard skill saw). Also, the scaffold was invaluable. I recommend you get you a few sets if you own an old house and expect to do the work on it.

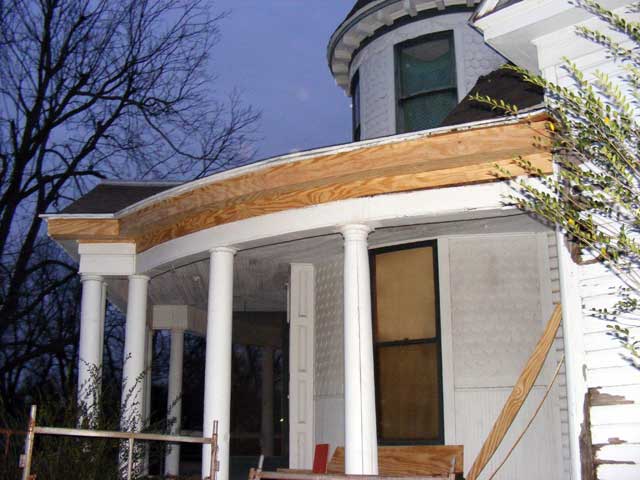
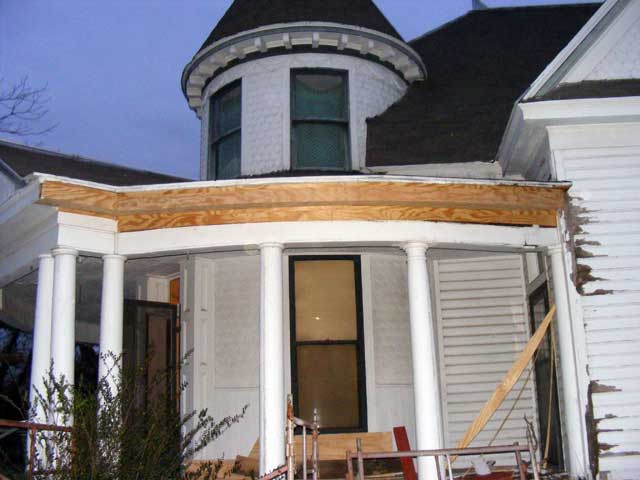
The completed eave. We still need to primer, caulk, and paint.

The completed eave. We still need to primer, caulk, and paint.

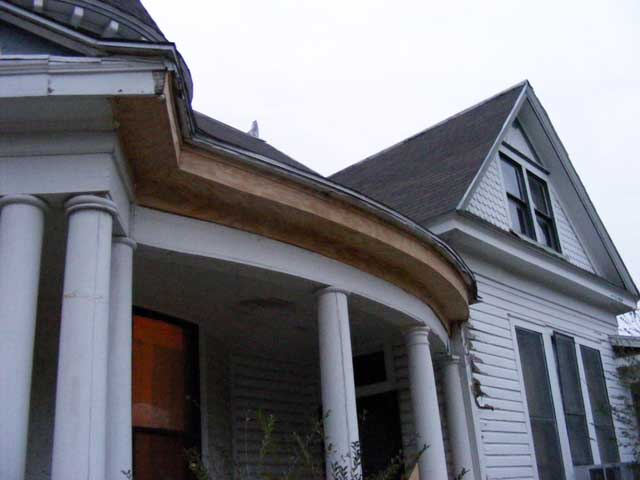
The curved undersides were a joy to cut. Gad.

The completed eave--Another view

The completed eave--Another view

Looks pretty good, yes?

The completed eave--This was a tough day's work.

The completed eave--This was a tough day's work.

More work will be required in the future for the “box” part of the porch support that holds up this eave, but it can wait and this project gets us “weatherproof” again and most importantly, prevents further damage from occurring.

Because the weather turned on us, and the fact that we just flat wore ourselves slap out on this project, we did not get the roof re-flashed, and we did not get the new area primed.

That’s a job for next weekend if the weather will allow. Also, we will be addressing the damage to the side of the house.

Update: 1/11/09

I re-flashed the roof this weekend so that the water run off is thrown clear instead of running down the side of the house. Also, the siding in the problem area had been caulked on the bottom seam, which actually makes things worse as any water that does get in the edges can’t get out again and instead runs along the siding inside the wall and causes further problems. I removed the caulk and scraped all the bad paint off…for the most part, all the way to the window. More work will be needed as we prep for paint, but that’s probably going to wait for other projects. “Weather tight” or “stopping further damage” is what we were after here.

The new eave primed. Also note the siding has been scraped and primed as well.

The new eave primed. Also note the siding has been scraped and primed as well.

There are a couple areas on the siding that need repair…Matching the siding pattern is not easy, so I’m going to attempt an epoxy wood repair on this. The kit is on it’s way. Also note, further repair is needed on the box below the eave…I will cover the hole so it’s bug free, but that repair is reserved for when we attack the porch ceiling. We’ll address both those issues under separate projects.

Looks pretty good!

Looks pretty good!

Now that the first coat of primer is on, I can fill any nail holes and caulk the seams. After the siding repair, it’ll get a second coat of primer and then a finish coat. We may delay that second coat/finish coat as we are changing up the base colors of the house and are not quite ready to paint the entire thing.

We’ll call this project done.

CUAgain,
Daniel Meyer

Posted in Carpentry/Structure | Leave a comment

Electric Surprise

There is always a surprise on every job…especially on old houses. Sometimes the surprise is pleasant, sometimes decidedly not so. Sometimes the surprise just lets you know how lucky you are…

Check out the pics below…read the captions:

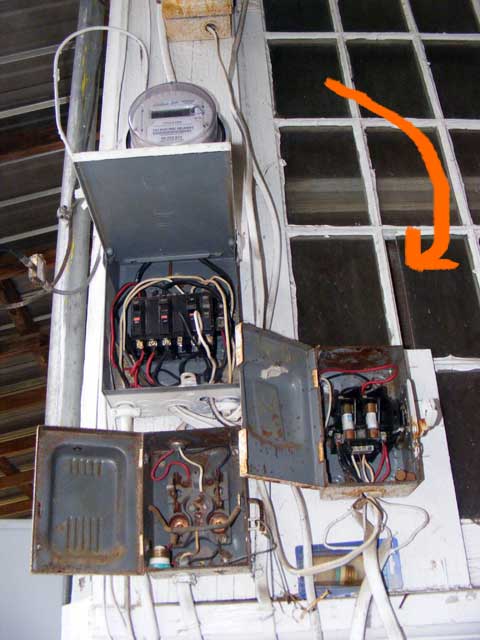
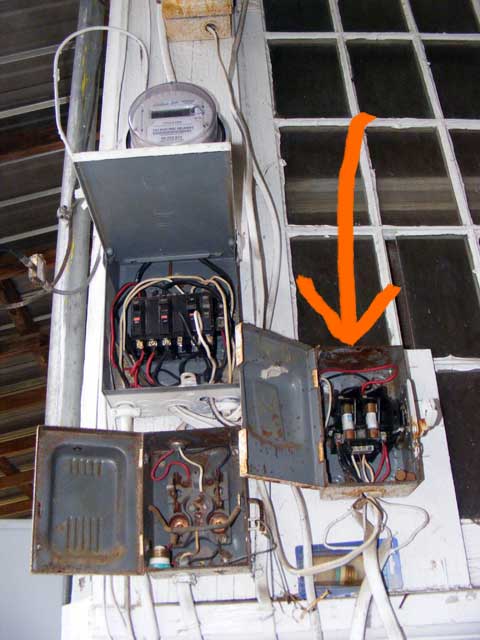
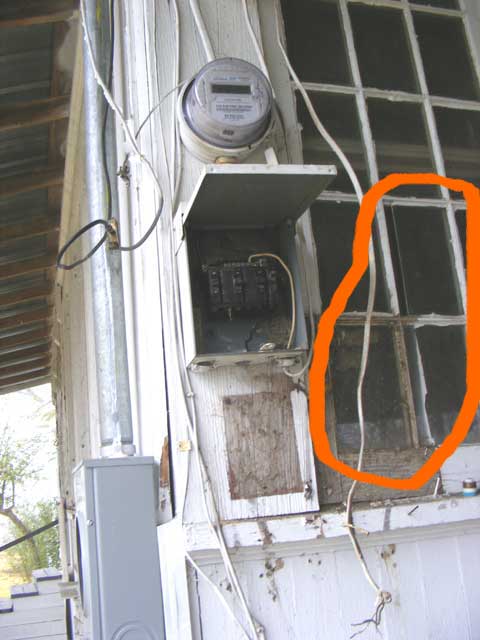
The existing service drop and fuse boxes in all their glory.

The existing service drop and fuse boxes in all their glory.

Notice this window...for some reason too small for the sash

Notice this window...for some reason too small for the sash

And note that this box is covering another window

And note that this box is covering another window

So, here we are with most of the junk removed...see the surprise yet? (Hint, it's not electric in nature)

So, here we are with most of the junk removed...see the surprise yet? (Hint, it's not electric in nature)

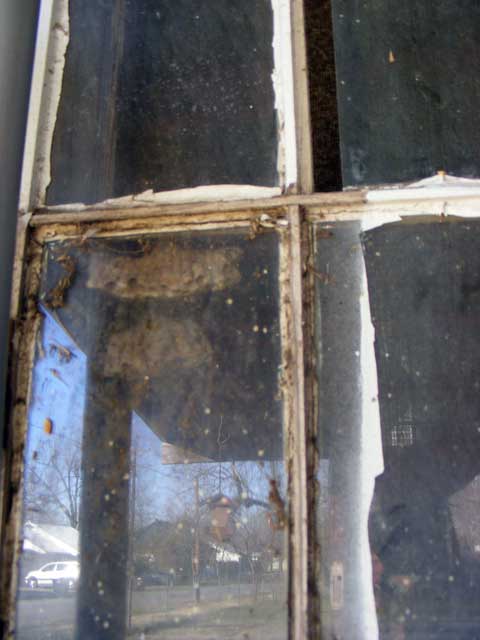
A closer view of the window. See what's wrong with this picture yet? Screaming death from the sky...that's what it is...

A closer view of the window. See what's wrong with this picture yet? Screaming death from the sky...that's what it is...

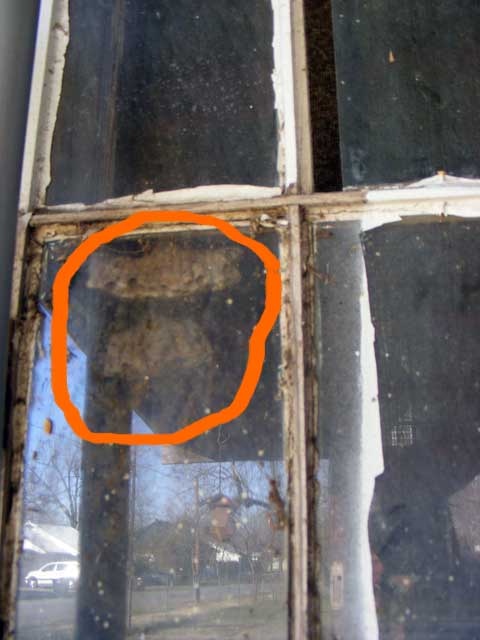
The surprise in waiting is circled.

The surprise in waiting is circled.

Yep, what we have here are several large wasp’s nests…they were entering the gap from the “too small” window pane, and making their home between the window and the interior screen, cleverly hidden behind the weirdly placed fuse box. There are at least a half dozen more in there.

I can’t tell you how glad I am that I discovered this in the cold weather…instead of having to greet the screaming death from the skies. It’s always fun trying to fight off clouds of stinging, lethal insects…all whilst sticking tools into live electrical boxes.

It’s been cold enough that they were dormant. I’ve got bug zot. They couldn’t move. I won.

Now I just have to clean up the mess…

CUAgain,
Daniel Meyer

Posted in Electrical | 1 Comment

Breaker Box Installation

This is Phase Two–the installation of the new internal breaker box(es).

The wiring in this house, though functional, must be updated. It ranges from “knob and tube”, to zip cord, to cloth sheathed romex run under the house. It is not suited for modern loads and with the 100 years of patching and minor repairs, has some safety concerns, particularly when I start plugging in big power tools.

I carefully thought out the breaker box arrangement in this house. We intend on doing some extensive lighting both in and out of the house, as well as adding modern kitchen appliances, heat and air, and other electrical loads. In addition, an (unattached) garage/shop is in the cards for some day.

Lots of spaces was key…but also, I had to be careful about the physical size of the wire chases I had to bring into the house to the main panel(s). Cost was also an issue, as well as correctly using the space in the house (more about this later). Eventually, I elected to install two-100 amp breaker boxes on the first floor, fed out of the main box installed with the service. This gave me the most spaces and options for the least intrusive race installation.

It is just possible that I’ll install a third one on the second floor if it results in easier wire runs for the room by room wiring. That’s the beauty of the big outdoor panel I installed with the service. Maximum flexibility with the least expense/trouble for needed changes.

We started this phase of the project late on the night of 12/26…with a trip to Home Depot…Why there you ask? Well, the funny thing is…they beat the price of both the wire and the boxes over any electrical supplier I called…AND they are open convenient hours. What a concept. (Lowe’s was a close second, would have been fine, but Home Depot was closer).

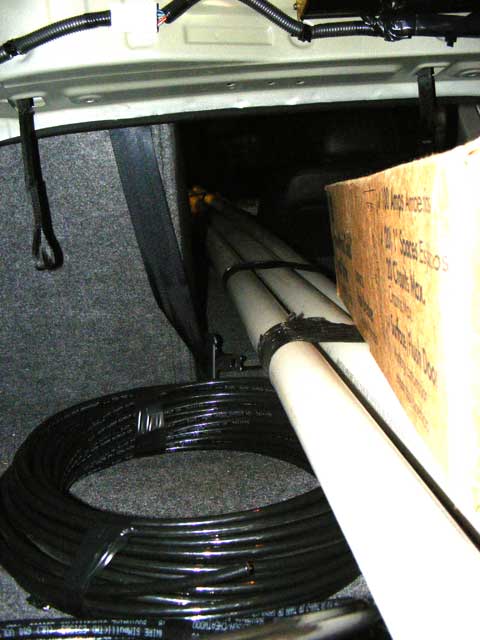
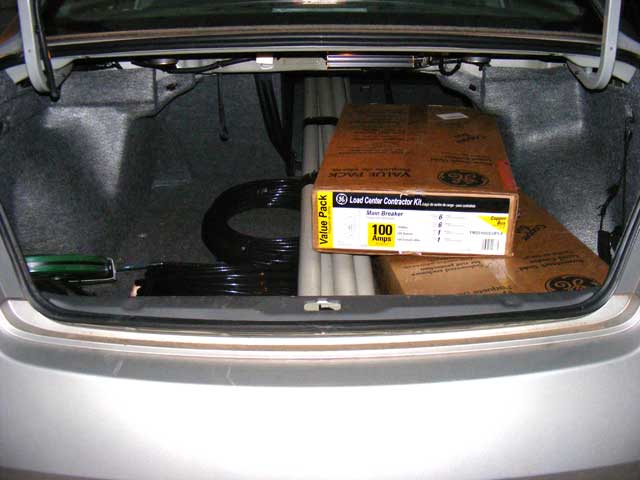
Psst…hey…wanna see what $900 worth of electrical stuff crammed into Crunchbird, my wife’s Nissan Altima, looks like? Seems we forgot to bring the truck on this trip…ah well.

Why Crunchbird? Well, a car’s gotta have a name…the wife hasn’t named it…and it went “crunch” early in its history. Explanations at the links.

The Altima (Crunchbird) gets to play a pickup truck tonight

The Altima (Crunchbird) gets to play a pickup truck tonight

That fold-down rear seat thingy came in handy…those are 10′ sticks of conduit.

Most of the shopping's done for this project.

Most of the shopping's done for this project.

My credit card exploded…but that’s okay. We got the stuff.

Stuffed in there is:

2 – 100amp 20 circuit GE breaker boxes.
60 feet of 1-1/2 PVC conduit.
366 feet of # 2 THHN copper wire.
A dozen or so small breakers of various sizes.
A bunch of misc fittings.
2 100 amp main breakers for the outside box.

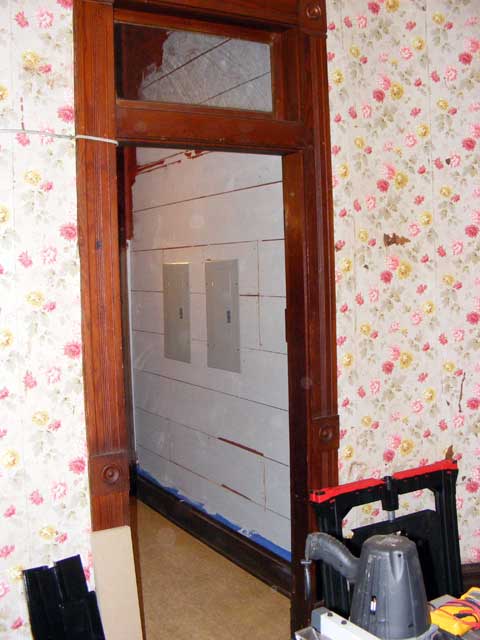
We selected the hallway between the kitchen and the dining room, directly opposite the bathroom (the bathroom was originally a butler’s pantry) for the location for the breaker panels. Several reasons for this selection…but mainly, not only does it meet all requirements of the National Electric Code, it doesn’t waste any space…

See, the hall is a hall…it is too narrow for a shelf or other furniture to be installed…and it is frequently traveled…so all it will ever be is a hall. So often breaker boxes get in the way of a great place for a shelf or something. Not here. We can hang art or something over them, but they will not be obstructed or obstructing to us in the future. Good use of space is important.

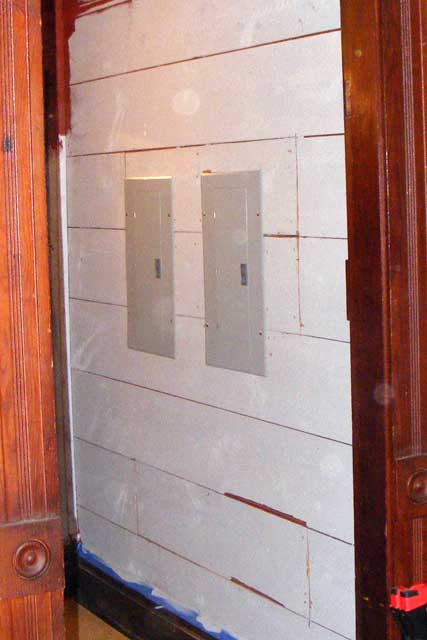
Note, the wallpaper is long gone, and this entire hall…in 1″x12″ tongue and groove rough red cedar, was for some reason stained an almost blood red…extremely dark. We slapped a $5 gallon of mis-mixed paint (check with your Home Depot or Lowe’s after any weekend) on it to lighten it up with something less than 10,000 watts of light. This was a temporary measure, but well worth the effort as with the wiring and other work, a finish covering for this wall is a long way off. Note, we are not “painting the woodwork”…

This wood was the “sheet-rock” of the day. It was rough cut intentionally to help the surface coat of burlap or plaster/lathe hang on better.

It is designed and installed with the intent to be covered up. It is, an underlay. The trim is mahogany and varnished and will remain so.

The location for the panels

The location for the panels

The most difficult part of this job is getting the wire chase (conduit) into the wall from the outside service box. There are massive beams under this house, and the walls typically sit right on top of them.

Some hours later I had the boxes installed.

Panels in the hall!

Panels in the hall!

Panels in the hall!

Panels in the hall!

I still need to pull in the service wire…I ran out of time and energy this weekend. That’ll be my next job!

Update: 01/02/08

My friend Mike came out today and, among other things, we got the wire pulled in and everything hooked up and tested. These panels are now hot and this phase of the project is complete!

The next phase is a room by room rewire

Posted in Electrical | Leave a comment

Paint Can of Worms…

Edit: Worked on some damage this weekend…some new information gleaned whilst working, and some input from the former owner added below…

Gad…what a can of worms this opens up.

It’s a seemingly simple question. What to prime my house with?

It’s cypress, ya see, except where it’s cedar, and probably sat with very little paint on it for a LOT of years. More recently (around a decade ago) it was painted white. Due to water intrusion there are issues with this paint in many areas, and due to incomplete preperation there are problems in others as well.

It is, of course, flaking off to clean wood. The worst place is where the porch eave is damaged, and the entire upper east dormer. It’s hard to resist, really, walking by a bad patch there is a nearly irresistible compulsion to just “flick” some off.

It’s like popping bubble wrap, really. But I must resist, yes? I’m not ready to finish stripping and prime yet…of course, the flaking paint is actually doing very little to protect anything and could actually be making things worse by allowing some water in but not easy drying out.

To flake or not to flake…

Ur…yah. Sorry. Seem to have digressed just a teensy bit.

Used to be that you would strip the old paint off, coat with a linseed oil/turpentine mix, and then top that off with a good oil-based primer. After a few days a top coat of any quality paint of your choice. Me, I’d normally choose an acrylic latex or such.

But, I’ve not done it in a while. Painting an old house is not like painting a new one. My 80’s tract home just needed washed down and coated with…well…pretty much anything. Maybe 5 gallons of paint was involved. It took me maybe 10 days of working an hour or two after work. Not a significant investment. Could have done it in a weekend…that is, if my job allowed weekends.

The Old Vic…well, it’s a different story. There might be 50 or 100 gallons of paint and primer involved before it’s all said and done. Thousands of dollars.

With the acrobatics necessary to reach and work on some parts of it…well, we’re talking about a lot of time and money. I really don’t want to have to do it over every couple years.

And then there’s the base color. It’s a dark base. Always more critical that you get it right. Sun, heat, fading…yeah.

So, I’ve been out of the game a bit…and felt I should ask/research.

Can of worms = asploded!

I’ve got a feeling paint and surface preparation methods have about as many opinions as there are people to ask.

It’s a bit annoying…many of the “facts” that are presented are from the standpoint of political views (the “green” movement) or what products are carried, rather than performance.

A for instance…at the big box stores (Lowes and Home Depot) you are VERY hard pressed to find any oil-based primer at all. When pressed, their paint “expert” (the kid with an hour-long training class on how to run the tinting computer) says such wonderfully ambiguous things as, “Latex based primers have come a long way in the past few years.”

Well, yeah, I’m sure they have…but how do they stack up against the oil based ones?

Consumer reports will tell me…maybe…for $69.95. Hard to tell, since I’d have to pay to find out if they even have a relevant article.

And what of the linseed oil?

Ask the pros? LOL! Yeah, right. The definition of “pro” is that they charge people for their work.

Of course, experience has value…so I ask. At least, I ask the ones that speak English and/or have lived long enough to graduate high-school. Every one of them has a different answer…ranging from adding powdered cayenne pepper to the paint (I guess it enhances its flavor when you use it on pancakes?) to priming the house with mis-mixed paints gotten for a couple bucks at the big box stores after a long weekend. “Mix” ’em all together, thin ’em down with water” they say, “and they’ll penetrate and look ‘just like primer!'”

Some of their paint jobs have lasted 3 whole years!

Sigh.

There’s articles on the ‘net. Mostly they start with the same question I have..IE, “What works the best?”, and then degenerate into “Oil bad.” “Solvent bad.” “Gonna be banned soon.” “Die in a fire!” Yada yada.

What. About. Performance.

Maybe “oil bad”, but there’s solvents in latex based paints as well…and is priming my house once every generation or so with oil really worse than a complete strip and redo every 5 years?

Performance. What holds? What works?

Maybe the product reps know…

The Olympic and Valspar rep (the 8 year old kid at Lowes) looked mildly curious. “Primer? Well, I think we carry some.”

The Behr paint guy (the 68 year old retired plumber at Home Depot who’s never painted in his life) actually stated that since it was a wood house, It didn’t matter what I used. I’d just have to keep repainting it every 3 years. Hmmm…$5000 worth of paint…every three years…divided by 36…carry the two…that’s a continued monthly expense that’s higher than my utility bills. I wonder if I should just set up an automatic banking deduction?

The Behr website is cute and flashy and slow and difficult to navigate…and while it does have information about their oil-based primer…it does not recommend a prep routine for the best performance of its own products. Oh, and pretty much no matter what I do it keeps putting me back on the screen about how they are top rated by JD Powers and Associates. Hmmm. Great. When I want to paint my car, I’ll look you up (just try searching for “exterior house paint” on JD Power).

The Valspar and Olympic sites were even worse…with no word at all about primer or best prep.

A note to web developers who love flash sites, please, please, take up a different hobby, maybe go into professional Russian Roulette or chainsaw juggling. I’m after information when I bother to look something up…they seem intent on selling me a “lifestyle”. (news flash, by the time I’m looking for paint, the lifestyle has long been chosen!)

Finally I went by the Sherwin Williams store, and they were quite helpful…best information I’ve been able to get anyway. Since they make (and STOCK) both oil and latex based primers, I figured maybe they would have information about which should be used and why.

Hands down, they recommended the oil based primer for the bare or nearly bare wood, regardless if I used their topcoat or not.

“Why the latex primers then?” I asked. They indicated those were for particular customer preference, places where the oil was prohibited, and climates where the houses were protected from the weather by “Mysterious flying unicorns farting rainbows”.

The latex primers would provide acceptable performance, but the oil based ones are recommended for my situation.

A hint showed that they were actually competent when I asked about tinting the primer (our base color choice is quite dark) and they knew exactly how dark they could get it, (and above that, can match exactly if you like).

The Lowes and Home Depot folks, when asked about tinting primer, all asked me, “Why would you want to do that?” It got even more comical when they all got together and tried to figure out how to make their computer do it (Home Depot had 1 gallon of oil based primer in stock, I was needing it as I was starting on a window sash, which will be black or nearly so when done).

I still haven’t found any useful information about first priming with linseed oil and turpentine mix. Helps? Hinders? Waste of time and money? Ruins the primer? Makes it stick better?

Decisions have to be soon. This weekend I’ll be repairing the significantly damaged eave…so priming is required…may as well start with the final, desired color top coat as well…painting can be a process I guess.
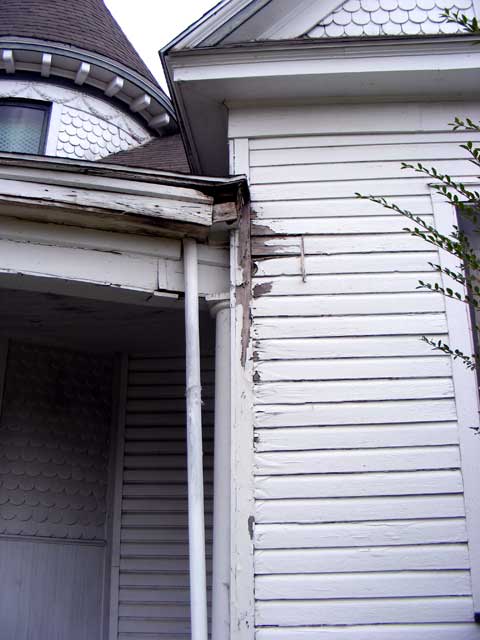
On the agenda this weekend...some proper flashing, a tear down and rebuild

On the agenda this weekend...some proper flashing, a tear down and rebuild

So, at this point…it looks like I’m gonna hit the Sherwin Williams system…oil based primer with their (very expensive) topcoat.

Can of worms anyone?

CUAgain,
Daniel Meyer

Posted in Paint | 2 Comments