Electric Service Riser Replacement Part 2

(best “Star Trek” voice) “Full power restored.”

Update: 12/18/08:

Today is when the fun starts. Time to pull the old system apart, figure out what’s what, and install necessary circuits in the new panel.

Some things can be removed…there was an electric stove feed for the second kitchen for example. It’s coming out as we’re not keeping a second kitchen (it will be a utility room instead), we’re not going to put in an electric stove, and it was not done particularly safely.

Another example, the dryer service will be redone and relocated and we’re not currently using it, so it can be removed as well (and so on).

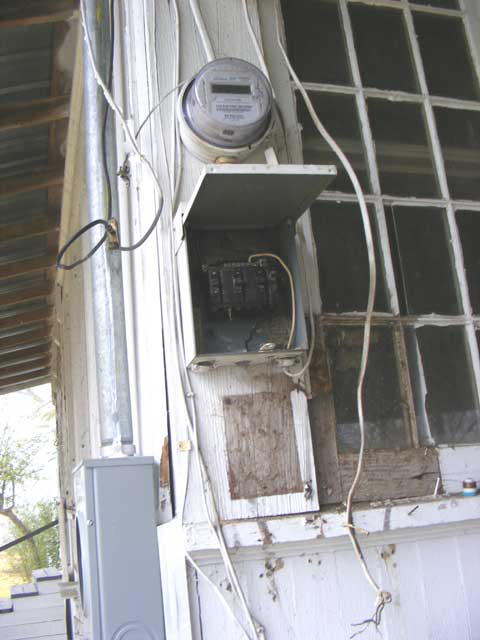
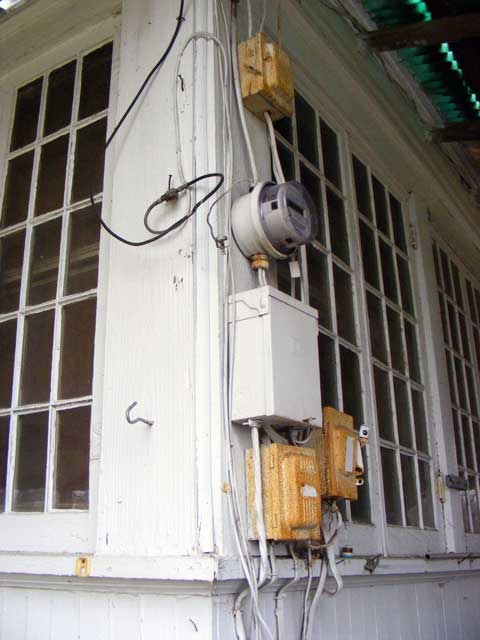
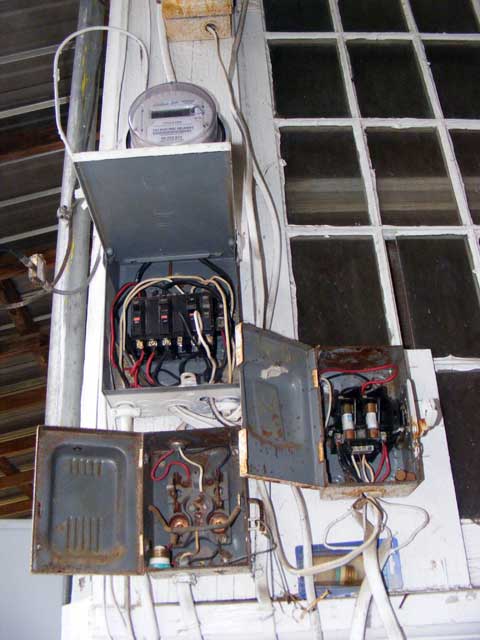
Exposed in all its glory

The Electric Service...Exposed in all its glory

Lots of sins are illustrated in the picture above…small gauge wires wired right into the mains for sub panels (exposed wiring, no fuse protection), multiple wires in single lugs, over-sized fuses and breakers for the particular wire attached (undersized wiring for some feeds…like the stove).

I systematically pulled everything out, figured out what it was/fed, tagged it accordingly or removed it, and removed the extra fuse boxes as I went. This was made more difficult by several factors.

There is no earth ground on the house…and the neutral connection was a bit corroded, resulting in a high resistance connection. This basically results in voltages being present in places they should not be…mostly very low amperages, so really not as dangerous as it seems, but it can be…I could read 50 volts on many circuits that were shut off for example, as voltage from lights and such that we had on (even something as innocent as a clock) was seeking a way to a good ground and “feeding back” through other things connected to the circuit. How about 65 volts on the metal clothes dryer case? Not a great thing. These issues are all corrected now.

The 8′ copper ground rod hammered into the ground for the new service, as well as new, fresh, and corrosion protected connections will take care of this problem in the future.

The other thing I found was that the “bakelight” plastic in the old fuse boxes was breaking down and actually conducting electricity. Again, low voltages/amperages, but measurable. High humidity and 50 years+ of dirt and dust probably contributed.

Two of the fused circuits were “neutral protected”…ie the hot was not fused but the neutral was…a dangerous practice, as when the fuse is removed or blown, the circuit is still “hot” if you happen to find a good path to ground. It was not uncommon in the past to fuse both the neutral and hot…again, a dangerous practice that has not been used in 50+ years or more, but it was never correct to only fuse the neutral. This was an error…and a dangerous one.

All removed of course.

The breakers were for the added window AC units as well as the stove and dryer. Most can be removed as we are changing them up and do not need them in the meantime.

One wire left..

One wire left..

One wire left…and I am highly entertained that every light and plug in the house still works.

Every. Single. One.

I eventually found the “crossover” and broke that one circuit into three…two for plugs and one for lights. These three circuits were all that was installed in the new box. Note, even these will get replaced, but we need them for now.

Update: 12/24/08

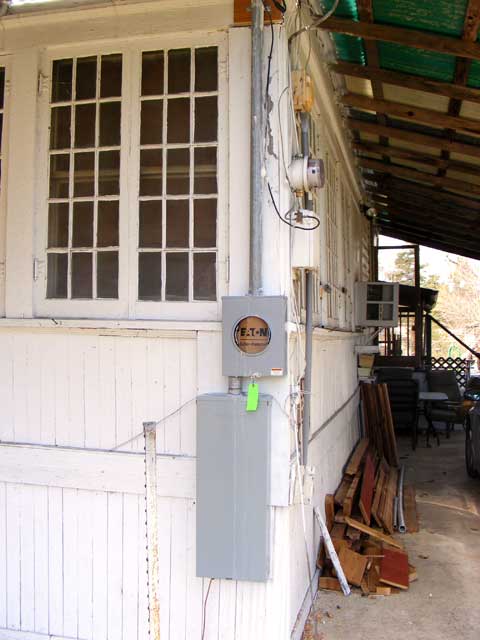
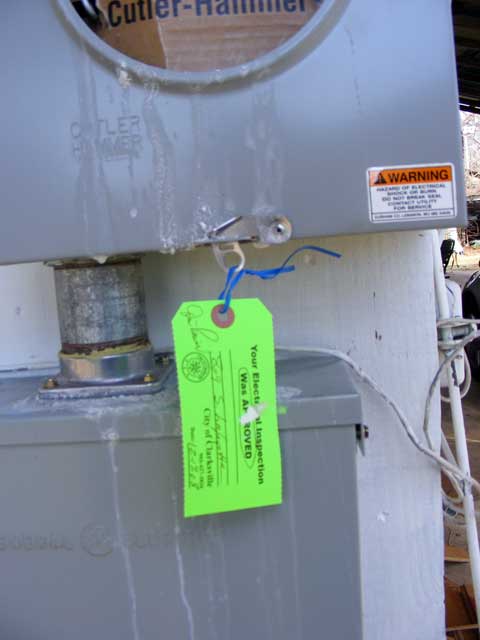
Green taggage achieved!

The new service riser...complete with Green Taggage!

The new service riser...complete with Green Taggage!

Green tag!

Green tag!

Next, the power company needs to switch to the new service riser. That’s scheduled for Friday morning.

Update: 12/26/08

Full power restored…

Let me just say…deregulation has not been kind to the power system/situation here in Texas. Please note, the Oncor guy…the one guy that actually does the work in our area…is VERY competent and efficient and I have only good things to say about him.

Getting to the point where he could come and do the work was a frustrating mix of hours on the (cell) phone…sentenced to voice jail, trying to work my way through established bureaucratic procedural nonsense, and a system that is designed so that nobody is responsible for anything.

The service guy went above and beyond to get our situation resolved. Suffice it to say, I mysteriously acquired his cell phone number, and he took care of us.

Seriously…more man hours were spent…by a factor of about five…to get the service change ordered than it took an actual working man to get the job done (including drive time)!

Soooo…Oncor arrived and pulled our old service. In a matter of about 10 minutes, he had us hooked up and running on the new riser. Yeahhhhh! Full power restored!

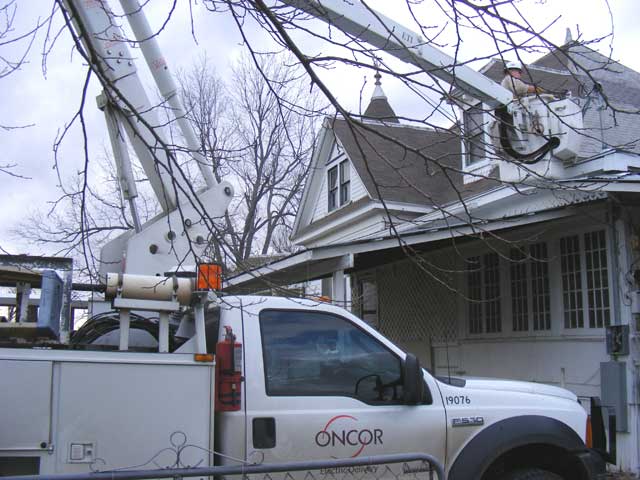
The Oncor guy...hooking up our new service riser.

The Oncor guy...hooking up our new service riser.

I can now comfortably run higher loads without the worry that the entire service entrance may blow itself off the house at any moment. Phew!

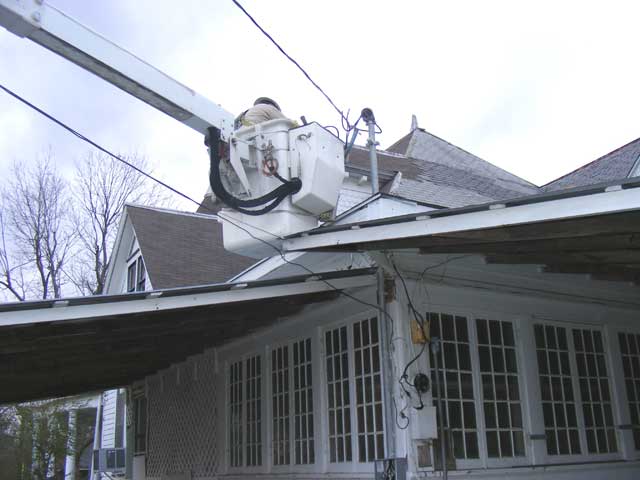
How incredibly handy...that bucket truck.

How incredibly handy...that bucket truck.

I have to comment as well…that the state of the art in service tools has come a LONG way since I did this kind of work. The bucket boom arm is insulated! In other words…there is a non-conductive section in the boom at any extension length. Way cool. Also, the service guy had this nifty battery powered electric/hydraulic crimper for crimping the wires together…very nice (the tool we had when I was doing it looked like a pair of bolt cutters and was powered by long handles and muscle…sometimes an issue when tangled up amongst live wires in a swaying bucket high above the ground.

That truck would be VERY handy for painting and other roof work…sigh…

Yah…you know you’re on old house owner when you find yourself lusting after a boom-arm.

Anyway, that’s the end of this project, having…just so far…taken about 12 hours of work (over two weeks) longer than it should have. Ah well, at least we’re moving forward.

Posted in Electrical | Leave a comment

Electric Service Riser Replacement

The wiring in this house, though functional, must be updated. It ranges from “knob and tube”, to zip cord, to cloth sheathed romex run under the house. It is not suited for modern loads and with the 100 years of patching, minor repairs, and questionable additions, has some safety concerns, particularly when I start plugging in big power tools.

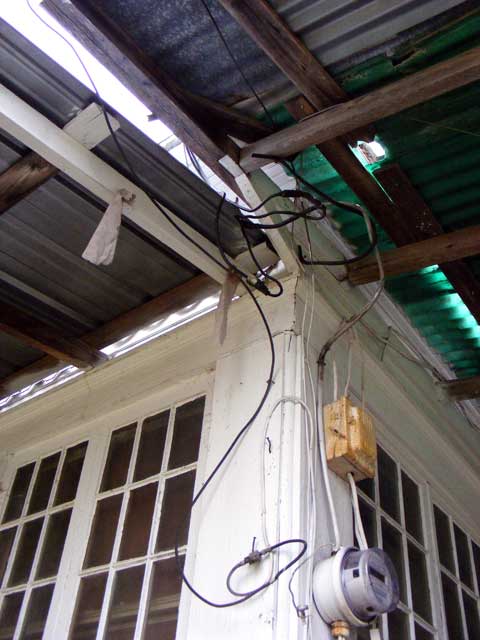
The existing service drop and fuse boxes.

The existing service drop and fuse boxes.

The first step is to replace the outdated service and its hodgepodge of random wiring, odd-sized fuses, questionable over-current protection, and scattered fuse boxes with a new, 200-amp meter-base and service drop, and a new external panel.

This is going to be interesting to work around.

This is going to be interesting to work around.

Materials have been purchased. It used to take a lot more effort to spend $600…

Update: 12/11/08:

Okay, I have the boxes in place. I must say, before it was “my house” I used to be able to put one of these up in a matter of hours. Not so now. Since it’s “my house”, “good enough” simply…isn’t. I need to make sure this installation lasts, trouble free, for another 100 years (or maybe just my lifetime).

This results in lots of extra work besides bolting up some expensive boxes and attaching them together with spendy wire.

The location is pretty much fixed. This is the only “utility accessible” area given the proximity of the streets and poles, unless I wanted to stick this box on the FRONT of my house (Nope!). I also checked and the service provider would not provide for underground service. So, here it goes!

First I had to remove about 40 jillion nails. Seems that over the last hundred years, anytime somebody didn’t know what to do for a moment or two, they stuck a nail partly in some random area of the house and hung something on it. Some trim repair was then needed, and then I had to install a platform for the boxes.

Some handy, sappy, yellow pine ship-lap that we removed from the 1920’s closet addition was just the key. Lots of cuts later, and I had a platform for the boxes. Some primer to preserve it, and I could then mount the service equipment.

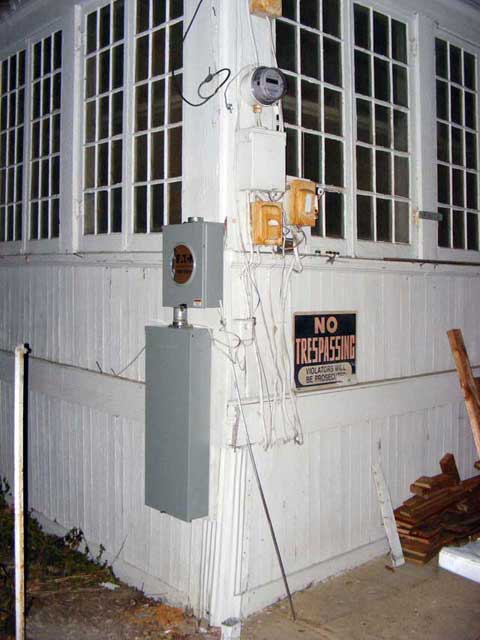
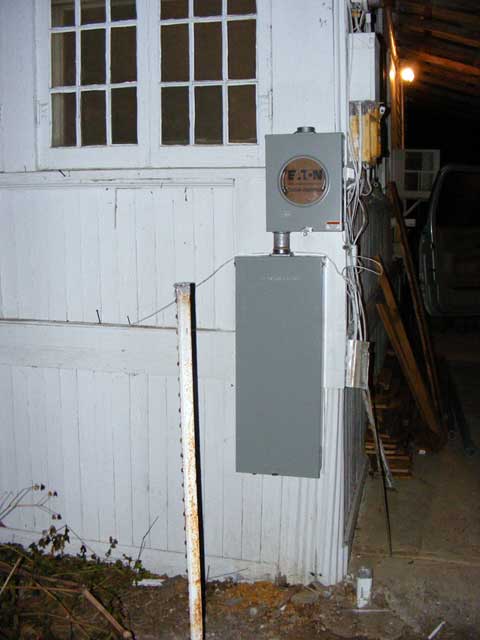
The service boxes mounted.

The service boxes mounted.

Some trim around the boxes, and a bit more caulking and paint, and they won’t even attract the eye. I did this with an eye toward looks (as much as you can with big boxes mounted on the house), longevity of the mounting and siding around it, and access to the underpinning of the house, which will need to be replaced eventually.

The large box is a weather-tight 200 amp main service box. It has spaces inside for 20 circuits as well. The purpose is to allow us to hook the current stuff up on breakers in that box, and then have the other service disconnected. We can then rewire the house as we move room to room or as needs require, removing the old circuits as we go. There is a service feeder pipe out its back and into the crawl space to handle both the temporary feeds, and the service feed into the house.

I will install a main breaker box inside the house, fed from this one, for the “real” rewire. Later, breakers for garage service or other outdoor projects can be added here as needed.

The mains are in place.

The mains are in place.

Update: 12/13/08:

Had some help today for the riser. My friend Mike and my Mom came by to see the house. I snagged Mike to help handle the riser.

Okay, today I installed the service riser. That’s the 10′ piece of rigid metal conduit from the top of the meter-base to above the roof-line for the power company to tie into. This was made more difficult by the two carports that meet at this corner and their odd construction. They limit access to the eaves, which is a problem as those eaves need attention.

I will be working on those carports, but simple removal is really out of the question. They are invaluable for working under in the Texas weather (especially the sun).

Installed the riser, the main service wire, the roof flashing, the weather-head, and the service attachment point (where the power company will hang their wire from). We had to access that section of the roof from an upstairs window (not easy at that) because the carports eliminate ladder access to this roof. Something will have to be done!

I got distracted and did not take a picture of the riser in place. I’ll get that and post it this week when I’m back working. Also some pictures of the mounting detail.

So…more pictures later this week!

I’m almost ashamed at how long this is taking. I really expected to wrap this one up in about 8 hours of semi-solid work. The factors coming into play here are that it’s our home, not one I’m paid to work on, so problem areas not related to the job at hand get attention as well. “Good enough” just isn’t. Also, I’m a bit out of shape/work habit for these sorts of things. It’s been a bit since I’ve been in the trade and jockeying a computer just hasn’t kept my physical prowess up where it should. THAT will change. Projects I’ve got in plenty!

Next, I’ll be hooking current wiring (required circuits only) into the new breaker box and removing the scattered fuseboxes from the wall. I expect this to take several hours, as I need to sort out what’s what in the mess. Some circuits are dead, some are live but I’ve no idea what they feed, some are unsafe, etc.

Once all that’s sorted out we’ll then have the service provider swap service risers so I can remove the rest of the old equipment.

..continued

Posted in Electrical | Leave a comment

Know Thyself

A tale of how a motorcycle ride, in a completely unexpected way…suddenly took me home.

Some would say I got myself into it…that I shouldn’t have been there. They could be right I suppose…but then, where would I have been? And what would I have found at that place instead?

***

It had been a long, hot day. It had started out as a short run to meet some friends for lunch, but afterwards I continued on, alone, into the summer afternoon.

The Dragon and I…the complicated man and the sophisticated machine…blood, bone, muscle, and steel, one with each other and the road, riding, carving, flying

We needed to taste the wind…we needed to feel the summer. We needed the passion. We needed the test. In the end I guess we rode simply because we could.

Highways and back roads. Places and names. So many they became a blur. East Texas. Southeast Oklahoma. Western Arkansas. Winthrop. Mcnab. Alleene. Bokoma. Boxelder. Kanawha. Swink.

Seeing it all. Tasting everything. Overwhelming detail with volume, yet experiencing both down to the depths of my soul, washing it free of the dust and staleness of everyday life.

This is what riding is all about.

Eventually I realized I’d better direct what had become an endless flight back toward my home turf or there’d be no telling where I would end up. There is a wife that may worry about me…and it helps that when she does call and ask where I am, that I actually have a good idea which state I’ve ended up in.

It’s amazing how often that question comes up…and how often I’m not entirely sure of the answer. I’ve occasionally taken to guessing.

A glance at the odometer told me it was time to find fuel for the machine again, and I suddenly realized that several hours had passed since the lunch…and that the colorful square crackers I’d scarfed up at the last gas stop (I’m pretty sure they contain absolutely no “cheddar cheese” despite the insistent label) have not done much to sustain me. Eight or more Cokes over the last 3 gas stops and the day’s intense heat had taken their toll as well. I raised a hand in front of my face and tried to hold it steady. The harder I tried the more it shook.

Yah. Time for a break and a real meal.

There’s a method I use to find good food in small towns that I’ve written about before. If you’re hungry, and in a small town…simply ride a couple or more main streets and look for the place that’s packed with pick-up trucks. That’ll be a good place to eat. This has resulted in countless tasty and affordable meals for me over the years…and I don’t think it’s failed to deliver more than maybe twice.

In this case, it was a small Mexican Restaurant on Main Street and near the edge of town. I’d already fueled the machine so I turned down a side street to get into the parking lot. A couple other vehicles were exiting the lot and blocked my access, so instead of stopping in the street and waiting, I shrugged and continued down the block. I like looking around small towns anyway, and this particular town was simply overflowing with cool old buildings.

I would simply do some sightseeing and turn at likely looking streets until I found my way back to the food.

I didn’t make it very far.

Shortly, the street I was on dead-ended into a cross street.

She was there…on the corner. Standing there with a regal air of dignified neglect. Her looks and pedigree obvious and impressive despite her age, even by my standards.

There were signs that despite her upbringing that she could be had…for a price.

I knew it then. I was even more sure an instant later when, staring at her, catching my breath and mesmerized by the sight, I suddenly cursed as I ran the Valkyrie past the stop sign, locking the big machine’s brakes and nearly running it into the yard across the street.

Feet down, tires still smoking, I turned to stare at her again. Yep. I was right. The signs were there. She could be had…for a price. She needed help, and soon. That would drive her price lower.

“Oh crap.” I mumbled, already knowing what I was going to do. “This is going to cost me.”

***

I’ve often been told to “know thyself”. I’ve been told that so often, that I’m no longer sure just who said it…or when and why. It seems to be part of the popular culture, now that I think about it.

Seems a noble quest anyway. I’ve striven to “know myself” for years now. I may be making progress. The days seem gone now, where my actions or reactions have surprised even myself.

But what if that’s not a good thing? What if, by “knowing myself”, I’ve taken all the need for experience out of life? Since I know, for instance, how I would react in a given situation, I need not seek out or experience that situation, yes?

On the other hand…it could save me same pain…some hardship. “Knowing” what could effect me and how, well, I could change my behavior and avoid that situation.

Heh heh…or perhaps not. What if, knowing made not the slightest bit of difference in the outcome?

Having fallen off a cliff for instance…knowing that a fatal “splat” is at the end of the plunge, might just put a dampener on the fun part. Human flight is a dream of nearly all. What if I completely missed that experience simply because I “knew” what was in store for me at the end?

What, precisely, then, would be the benefit in knowing?

And what if…by “knowing” the outcome…I influence the events to the point where there is ONLY that possible outcome?

“Splat” seems a terrible thing to do just because I “know” that I have to…

Experience…and knowing…suddenly seem to me to be a limiter…a cage…a prison of diabolical design…and one I’ve been fool enough to build for myself.

Deep questions. Deep thoughts. Deep doubts. Deep enough that I realize maybe…just maybe…I don’t know.

And today I see that as progress.

But perhaps I digress.

***

I never did make it back to the Mexican Restaurant. I still need to…I’m sure by the volume of cars in the lot that it is quite good.

The Lady on the corner was a massive 100+ year old Queen Anne Victorian house. She was obviously vacant but in reasonable condition. Her lines and upbringing still very obvious, her structure sound. She could be had for a price alright; the “signs” were real-estate signs. She was for sale. She had a tower.

She inspired thoughts…and desires…that builder’s itch…that tinkerer’s twitch…that artist’s inspiration.

I stared a moment or two more (or perhaps it was an hour) and then left town, eastbound and fast into the approaching night, determined not to look further…to put her out of my mind. Sure I could help…but the time wasn’t right. It was too soon. Or too late. Or too far…or perhaps too close. Nope. I couldn’t. Well, yes I could…if I was honest with myself about it. Sure I could. But I shouldn’t. Nope. That was that.

I lasted nearly two months before I typed the Realtor and location into a search engine. “It’s okay to look now.” I told myself. She would be far, far out of my price range. She would be too far gone. She would be long sold already.

“Ohhh, crap.” She was still listed. The condition was better than I expected. The price was easily within reach. The serious problems precisely fit my skills and strengths.

I showed her to the wife. “Hey honey, look at this…”

She would set me straight. It’s not time. It was too soon. Or too late. Or too far. Or too near. Right?

Yah, right. She was no help at all. “Ohhh cool! Let’s go look!”

We closed on December 1st.

Ah well…I’ve gotta ride…and ride hard…but I’ve gotta come home too…and home should at least be as interesting as the people in it.

I can guarantee you this one will be.

Please read more of my motorcycling adventures HERE

Wandering the backroads of Texas

Wandering the backroads of Texas

CUAgain,
Daniel Meyer

Posted in Miscellaneous | Leave a comment

The Big Bulb…

Now that’s a big light bulb…

We found this sitting on a shelf. The loose filament says it is burned out. I know everything’s bigger in Texas but really….

I know it’s not terribly old…but I’ve never seen one and I’ve been an electrician a long time. Anybody know what it fits? It is shown here next to a typical 60 watt bulb for reference.

Note…I’ve had several helpful readers email me and let me know…this base is called a “Mogul” base…and now that I know the term they are easily searchable. This size is still available…typically in 250 watts or so…widely used in floor lamps in the past…probably what this one was for. They are still used for some HID bulbs now, as well as for some landscaping lights.

Adapters and even CFL replacements are available for them if you have something like this.

CUAgain,
Daniel Meyer

Posted in Electrical, Wierd and Wonderful | 1 Comment

Closet Addition Removal

In 1922 the owners created a couple extra closets and effectively split the house in half by walling off a segment of the hallway. This covered the door from the dining room to the hall (that became one of the closet doors) and they had to remove the double French doors from the entry parlor to the hallway.

The hall entry as closed off in 1922

The hall entry as closed off in 1922

This resulted in a MASSIVE wall addition in the hallway, and vastly darkened the space with the removal of the French doors. It also obstructed the staircase, which while still usable, was no longer the central feature of the space.

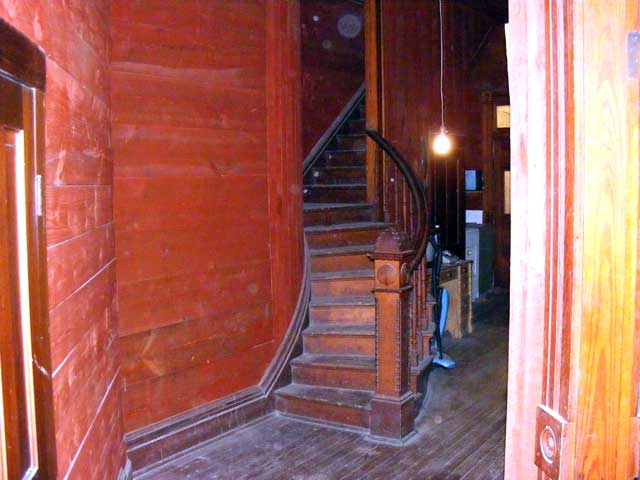
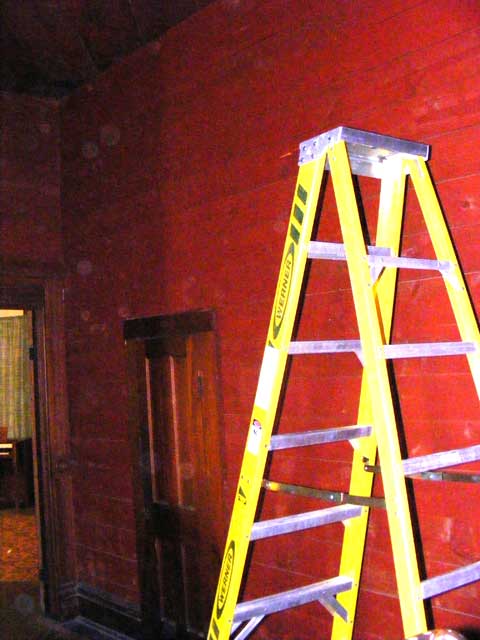
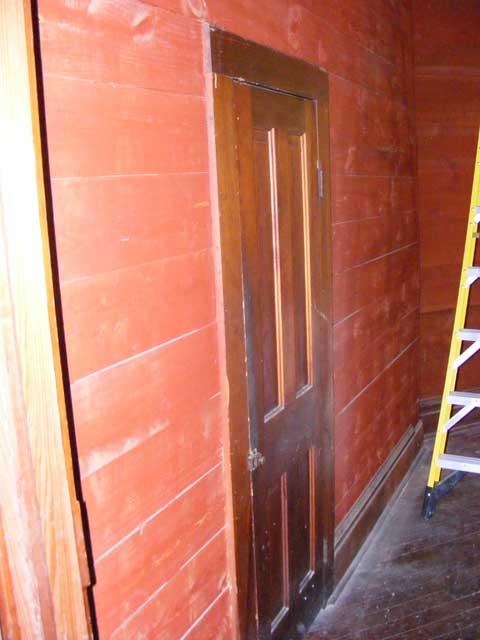
Either during that addition, or sometime after, they stripped the aging and stained wallpaper out of the hall, but unfortunately, then sprayed all the exposed rough lumber with a deep red stain, perhaps aiming for the Mahogany color of the wood work. They even included the ceiling. This created a space that was so dark and claustrophobic that it is nearly impossible to even photograph. It simply swallows all light.

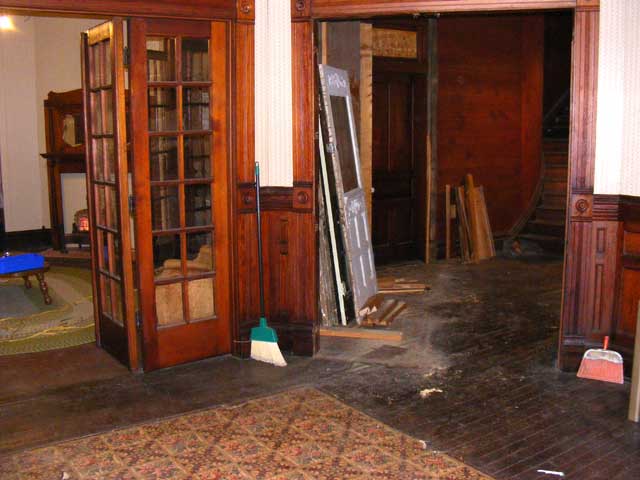
Looking in the hall door. The wall to the left is the addition.

Looking in the hall door. The wall to the left is the addition.

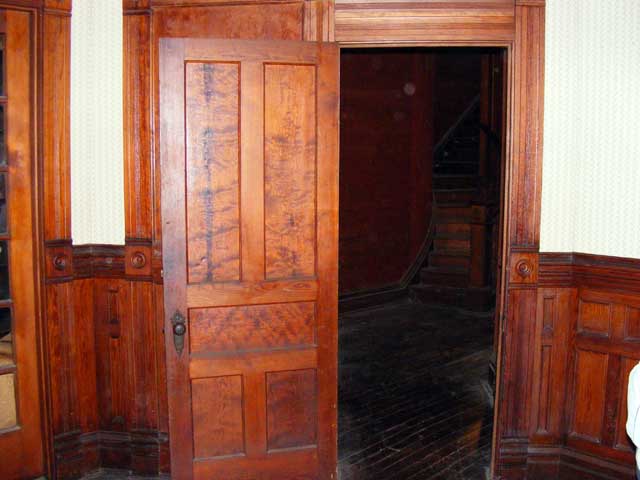
Looking from the hall out the entry parlor door. The wall to the right is the addition.

Looking from the hall out the entry parlor door. The wall to the right is the addition.

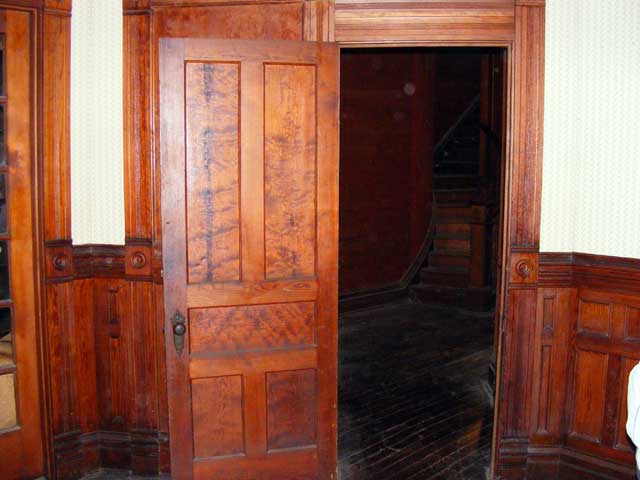
The hall closet door. That entire wall is the addition.

The hall closet door. That entire wall is the addition.

Removal of this addition was high on our list. This single construction changes the house from light and airy to dark and forbidding. It also makes it a trip through several rooms to get anywhere. Since it was cold and dark outside, and this project doesn’t strain the budget (it cost exactly “nil”), we set to it.

We set to work with a Stanley Wonderbar (Hint: Get you one of these miracles of destruction!). There’s an article about it posted in our tools section. We had to be careful not to further damage the floor or door trim, and additionally, moldings removed from the hall side of the French doors had been used as trim and fill in this construction. We wanted to save those.

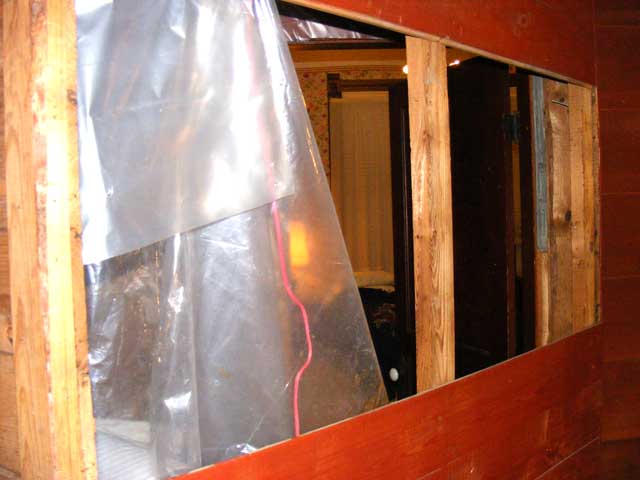
Within a couple hours we could see what we had…

A few planks removed, looking through the "real" hall door into the dining room.

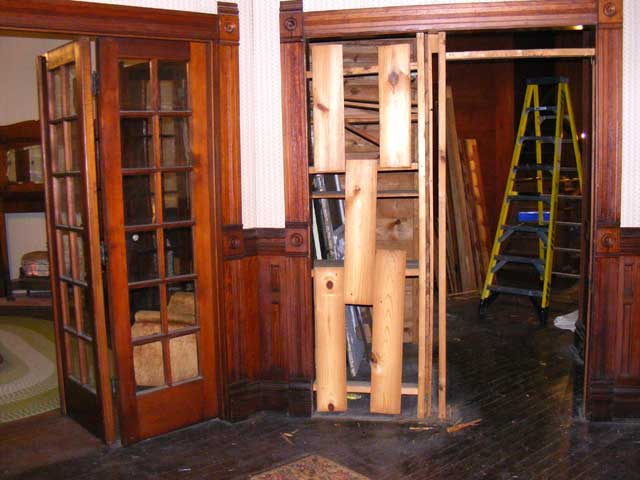
Some more work and things started to look interesting…

From the entry parlor...the actual doorway is beginning to become obvious.

From the entry parlor...the actual doorway is beginning to become obvious.

After removing what has to be 3/4’s of a ton of lumber, and pulling sixty-bajillion nails, we now have a usable and friendly hallway again, as well as a door from the dining room to the hall.

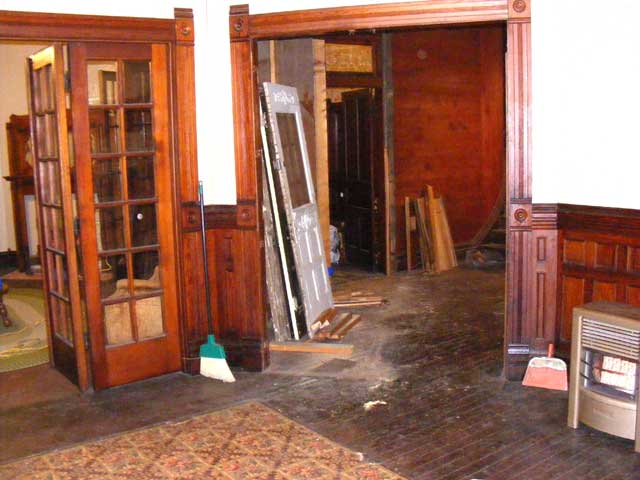
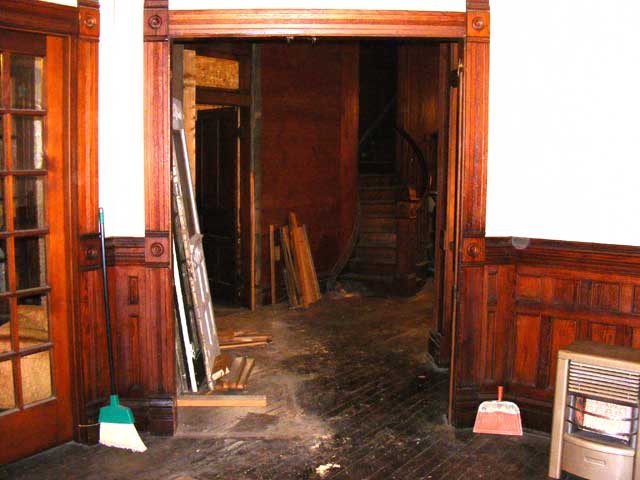
Looking from the entry parlor to the hall.

Looking from the entry parlor to the hall.

Hard to believe how much better it looks.

Hard to believe how much better it looks.

The house and hall immediately become more open, airy, and friendly.

The house and hall immediately become more open, airy, and friendly.

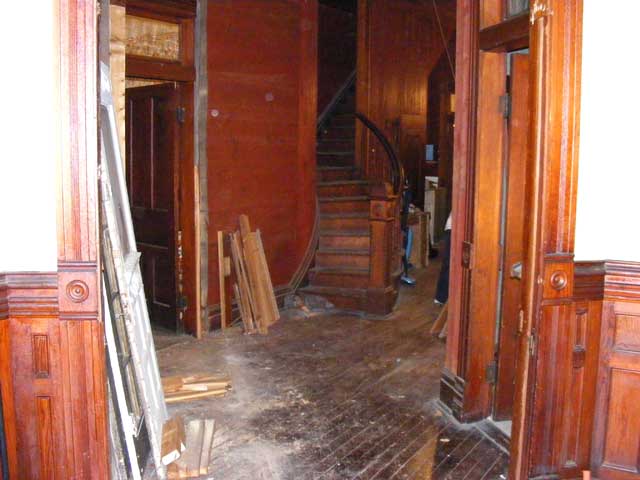
A great view of the staircase. There's more to be done there.

A great view of the staircase. There's more to be done there.

Looking back at the area we just uncovered shows the scale, and the old wallpaper gives a hint of the former grandeur of this place.

Looking back at the area we just uncovered shows the scale, and the old wallpaper gives a hint of the former grandeur of this place.

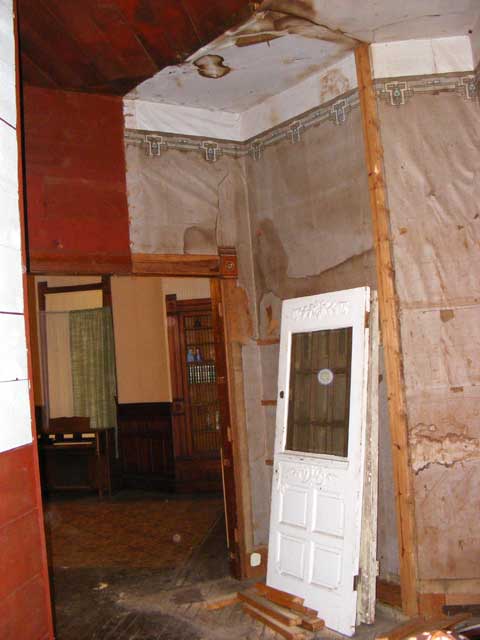
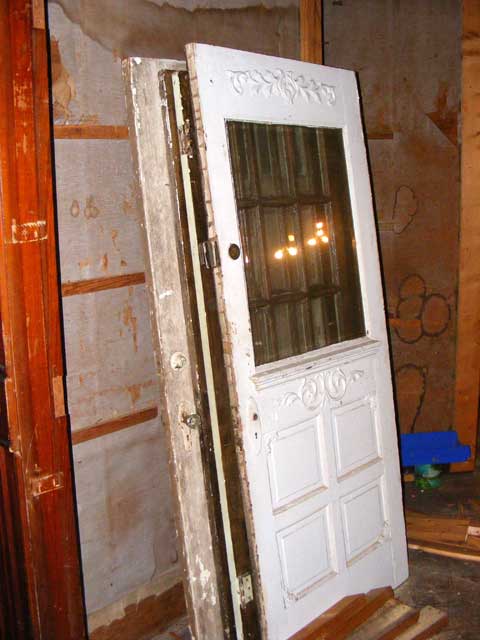
Removal of the closet walls is one way to get the spare doors out of it...

Removal of the closet walls is one way to get the spare doors out of it...

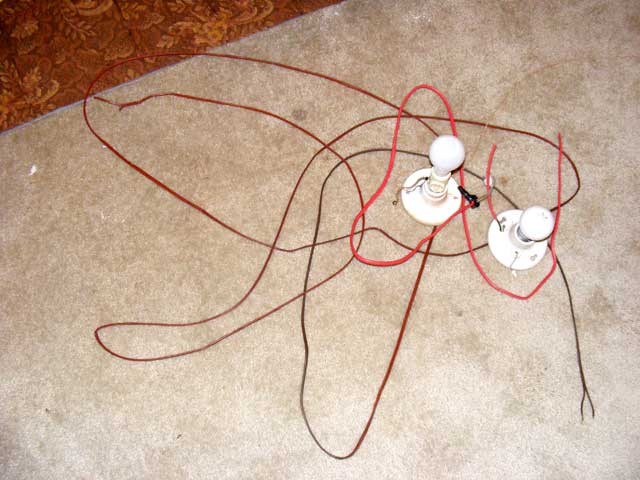
The wiring in this house like a Hollywood movie sequel…old and badly added onto. It ranges from knob and tube, to zip cord stapled to the wall, to romex run under the house. Sometimes you’ve just gotta rip it out and start from scratch. Here is the closet wiring…the first of much I’ll be happy to rip out. The zip cord ran out of the wall addition, across the hall ceiling, and was spliced onto the knob and tube feed for the hall light.

The closet wiring. The first of many similiar things I'll be ripping out.

The closet wiring. The first of many similiar things I'll be ripping out.

Mouseover this picture to compare before and after
Before and after

Well, that’s it for this project. A little more sweeping is needed but that’s about it. This took about six hours of steady work and cost nothing.

We also still have to install the French doors, but first we have to recover them from another alteration of the house. That will be another project.

Hope you’ve enjoyed. Feedback is welcome!

CUAgain,
Daniel Meyer

Posted in Carpentry/Structure | 1 Comment

Dewalt Sawzall

This is a Dewalt Sawzall…and when you feel the need to break one of these out, you are probably dreading the amount of work that is to come. Actually though, this thing makes any sort of difficult cutting challenge remarkably easy.

As of today (12/14/08) I don’t own one of these (hint: Christmas is coming!) but I had the occasion to use my friend Mike’s while installing my electric service equipment. With the 4 position blade (hold the tool as needed and cut in any direction basically) it is very effective at cutting hard to get at stuff.

I. MUST. HAVE. ONE.

No…no. Not MUST. Will.

Cutting into the roof to get the electrical riser through, I of course, found another roof to get through. Gad. This saw made the difficult to get at cut take about two minutes.

Highly recommend this for the old house worker-on-er. I’ll have one shortly…this particular brand as well. I’ve had several other tools by this maker and you cannot ever go wrong with Dewalt tools as far as quality goes.

The Dewalt Sawzall

The Dewalt Sawzall

Update:
I purchased one of these kits for about $75 on the re-manufactured market with a full warranty. It is outstanding and extremely useful. Another “must have.”

Dewalt makes good stuff.

CUAgain,
Daniel Meyer

Posted in Tools | Leave a comment

Sawhorse Kit

On a project such as this, I’m of the school that believes, “You can never have too many sawhorses.”

My friend Mike got me a sawhorse kit for Christmas.

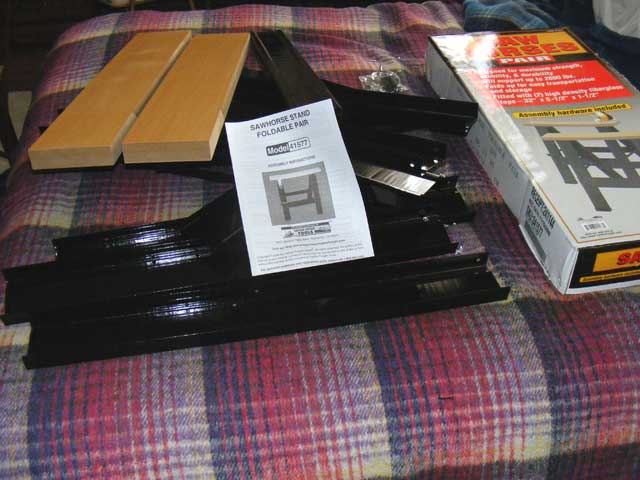
Sawhorse Kit...Can y'all tell I'm about to have an adventure?

Sawhorse Kit...Can y'all tell I'm about to have an adventure?

This is a Harbor Freight sawhorse kit.

Now…I figured something out…it says, “Assembly hardware included” on the box. That’s Chinese for, “Some assembly required.”

Understand, to the Chinese, “Some Assembly Required” means “it’s as far apart as it can possibly be without having been reduced to its component molecules by an atomic blast…”

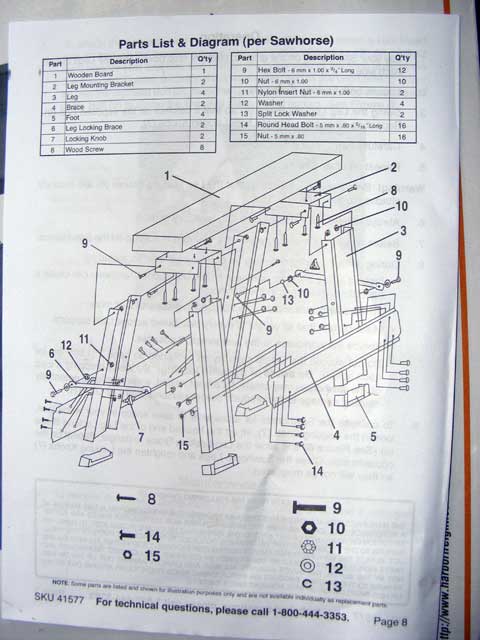
There are no less than 53 parts here…for EACH sawhorse.

The fact that you need directions for a sawhorse is probably a very bad sign

The fact that you need directions for a sawhorse is probably a very bad sign

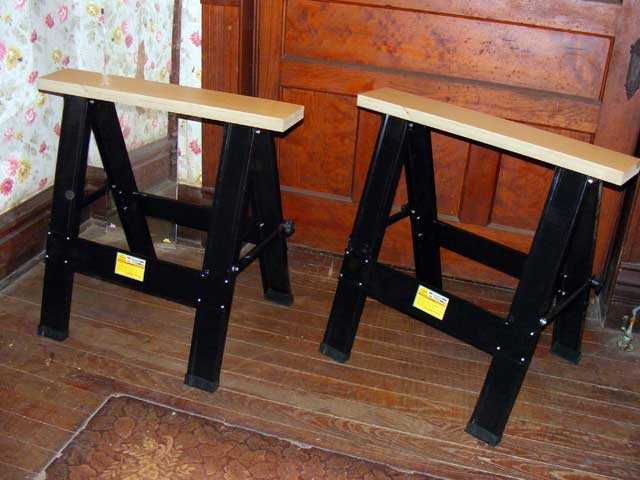
They took me about an hour of solid work to put together. They seem stable and will no doubt work just fine.

A couple disadvantages…the “high density fiberglass” (as it says on the box) tops are really particle board…the formaldehyde emitting kind (I recognize the scent from my days in a mobile home)…with a top covering of laminate. The formaldehyde is not really an issue…but the disadvantage of the particle board is that I would be concerned about leaving them outside in damp conditions, and also the laminate is pretty slick…your work will tend to slide around on the sawhorses.

The bright side is that if they do swell up, the hardware itself is reasonably solid and a couple 2×6’s or something can be screwed right on in it’s place.

The other problem I found is that the feet like to pop off…a little construction adhesive (as soon as I have an open tube) will take care of that.

They are VERY strong…I expect I could park my truck on them (carefully)…and will come in handy.

Sawhorses Assembled

Sawhorses Assembled

CUAgain,
Daniel Meyer

Posted in Tools | Leave a comment

Painter’s Pry Bar

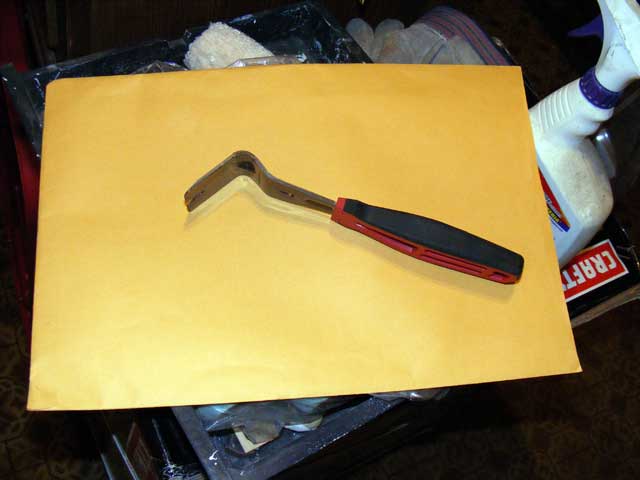
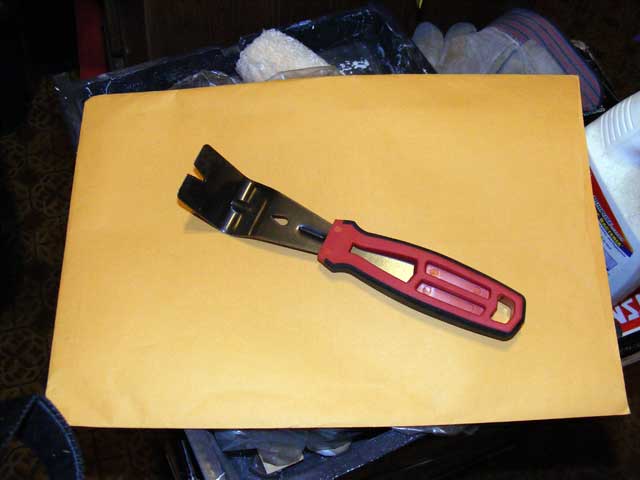
This is a Painter’s Pry Bar. It’s used for removing trim, moldings, and other things that need a fine touch to remove without damage.

Painter's Prybar

Painter's Prybar

Painter's Prybar

Painter's Prybar

It has a very thin blade for getting behind things, and is strong enough to get the stuff pried loose. Very handy for those occasions that require a delicate touch.

It’s helped me remove several pieces of trim without damage. Particularly important when trying to match or preserve parts of the house.

CUAgain,
Daniel Meyer

Posted in Tools | Leave a comment

Compound Miter Saw

Santa brought me this for Christmas.

(puts on his best “Dr. Evil” voice)

It’s a saw! A saw with fricken lasers on it!

(ends his best “Dr. Evil” voice…my wife’s looking at me all kind-of-strange like)

Hitachi 10 inch Compound Miter Saw

Hitachi 10 inch Compound Miter Saw

This is a 12″ Hitachi Compound Miter saw. With all the framing (with angles) I’ve got to do…not to mention trim…lots and lots of trim…this should make my job much easier and my work more accurate.

It’s got a laser on it to project the position of the blade onto the work piece…thus, even more accurate.

update:
After a bunch of use I have to say…I use this saw MUCH more than I thought I would…probably more than any other saw. It is extremely helpful on the job, and very high quality.

I am officially impressed.

CUAgain,
Daniel Meyer

Posted in Tools | 1 Comment

Table Saw

A table saw is a requirement for ripping sheet wood, trim pieces, or any other sorts of accurate lengthwise cuts (rips) on lumber or mdf. The short of it is, we needed one.

I looked around on the ‘net…even Craigslist for used ones and learned a lot.

You can spend a LOT of money on a table saw. Well, you can if you have it to spend. I need a decent saw, but I’m not a professional woodworker. On the other hand, I know from experience that crappy tools make the work harder, and may not last through the job, making you spend more than you would have on a decent tool to begin with. A compromise is in order of course…here’s mine.

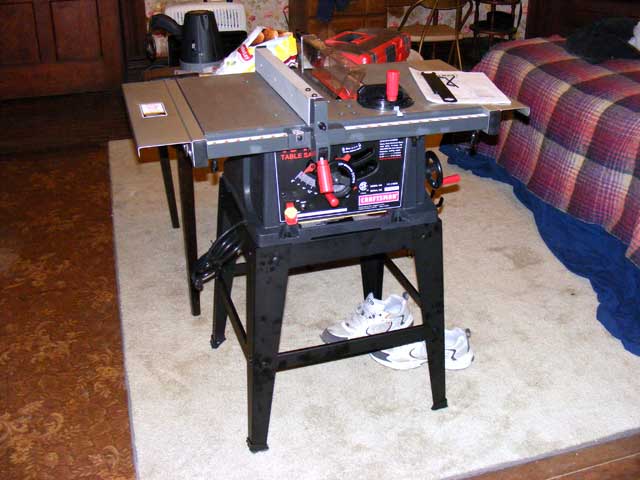
Craftsman (Sears) put this one on sale…a 10″ model (10″ refers to the blade size), with table width extensions and a stand. It has a metal table and rip fence and seems fairly accurate as far as angles and such. Used models of the same saw were selling for more on Craigslist than the new one was at Sears.

Hopefully it will serve the extensive medium and occasional heavy duty use for this project, and then serve for the intermittent homeowner uses after we finish. We’ll see, and of course, we’ll let you know.

$99 bucks. It seems to happen semi-regularly…watch for it if you need one.

Craftsman tablesaw

Craftsman tablesaw

It’s in the bedroom, because as with nearly everything nowadays, it came from China crammed into the smallest box possible and needs “some assembly”. “Some Assembly” actually means it’s as far apart into it’s component pieces as possible, and everything that they put together for you was done wrong anyway. All the parts were there though…and it went together just fine. The base is kind of flimsy though.

It came equipped with a decent combination carbide blade as well, instead (as I expected) a cheapo blade.

It was also cold and dark outside and until we get some more wiring in, the bedroom (which is really the dining room) was the only place with sufficient light.

Yeah…I got to play with a table saw in the bedroom.

I think I kind of like this renovation stuff!

CUAgain,
Daniel Meyer

Posted in Tools | 1 Comment