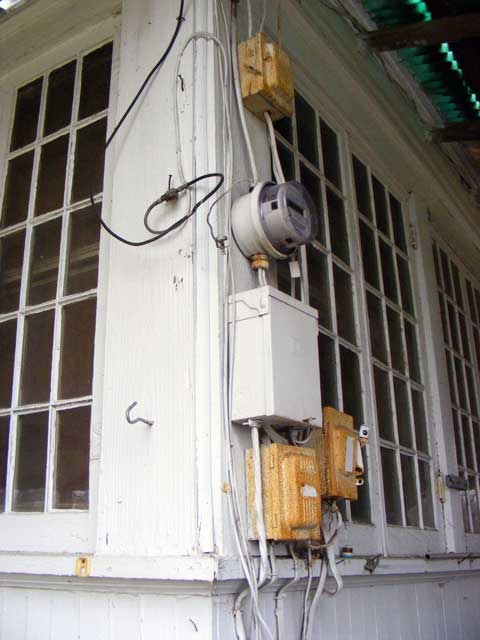
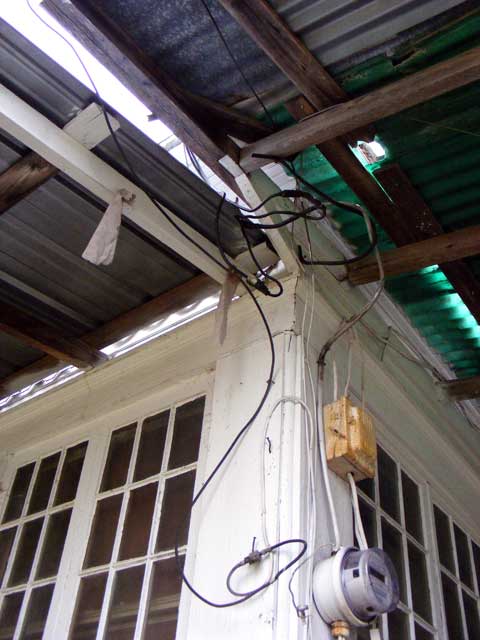
The wiring in this house, though functional, must be updated. It ranges from “knob and tube”, to zip cord, to cloth sheathed romex run under the house. It is not suited for modern loads and with the 100 years of patching, minor repairs, and questionable additions, has some safety concerns, particularly when I start plugging in big power tools.
The first step is to replace the outdated service and its hodgepodge of random wiring, odd-sized fuses, questionable over-current protection, and scattered fuse boxes with a new, 200-amp meter-base and service drop, and a new external panel.
Materials have been purchased. It used to take a lot more effort to spend $600…
Update: 12/11/08:
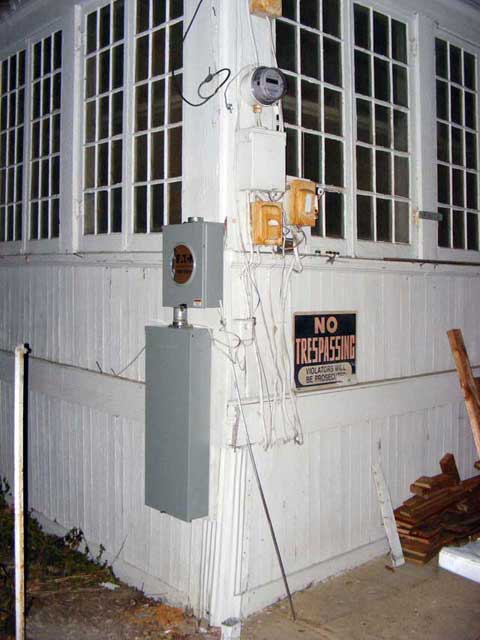
Okay, I have the boxes in place. I must say, before it was “my house” I used to be able to put one of these up in a matter of hours. Not so now. Since it’s “my house”, “good enough” simply…isn’t. I need to make sure this installation lasts, trouble free, for another 100 years (or maybe just my lifetime).
This results in lots of extra work besides bolting up some expensive boxes and attaching them together with spendy wire.
The location is pretty much fixed. This is the only “utility accessible” area given the proximity of the streets and poles, unless I wanted to stick this box on the FRONT of my house (Nope!). I also checked and the service provider would not provide for underground service. So, here it goes!
First I had to remove about 40 jillion nails. Seems that over the last hundred years, anytime somebody didn’t know what to do for a moment or two, they stuck a nail partly in some random area of the house and hung something on it. Some trim repair was then needed, and then I had to install a platform for the boxes.
Some handy, sappy, yellow pine ship-lap that we removed from the 1920’s closet addition was just the key. Lots of cuts later, and I had a platform for the boxes. Some primer to preserve it, and I could then mount the service equipment.
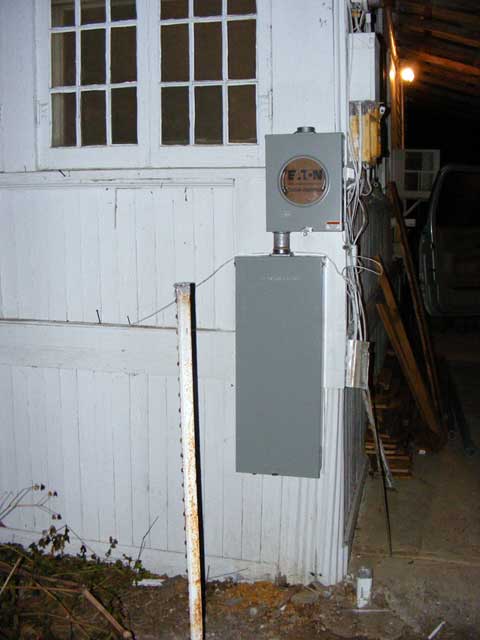
Some trim around the boxes, and a bit more caulking and paint, and they won’t even attract the eye. I did this with an eye toward looks (as much as you can with big boxes mounted on the house), longevity of the mounting and siding around it, and access to the underpinning of the house, which will need to be replaced eventually.
The large box is a weather-tight 200 amp main service box. It has spaces inside for 20 circuits as well. The purpose is to allow us to hook the current stuff up on breakers in that box, and then have the other service disconnected. We can then rewire the house as we move room to room or as needs require, removing the old circuits as we go. There is a service feeder pipe out its back and into the crawl space to handle both the temporary feeds, and the service feed into the house.
I will install a main breaker box inside the house, fed from this one, for the “real” rewire. Later, breakers for garage service or other outdoor projects can be added here as needed.
Update: 12/13/08:
Had some help today for the riser. My friend Mike and my Mom came by to see the house. I snagged Mike to help handle the riser.
Okay, today I installed the service riser. That’s the 10′ piece of rigid metal conduit from the top of the meter-base to above the roof-line for the power company to tie into. This was made more difficult by the two carports that meet at this corner and their odd construction. They limit access to the eaves, which is a problem as those eaves need attention.
I will be working on those carports, but simple removal is really out of the question. They are invaluable for working under in the Texas weather (especially the sun).
Installed the riser, the main service wire, the roof flashing, the weather-head, and the service attachment point (where the power company will hang their wire from). We had to access that section of the roof from an upstairs window (not easy at that) because the carports eliminate ladder access to this roof. Something will have to be done!
I got distracted and did not take a picture of the riser in place. I’ll get that and post it this week when I’m back working. Also some pictures of the mounting detail.
So…more pictures later this week!
I’m almost ashamed at how long this is taking. I really expected to wrap this one up in about 8 hours of semi-solid work. The factors coming into play here are that it’s our home, not one I’m paid to work on, so problem areas not related to the job at hand get attention as well. “Good enough” just isn’t. Also, I’m a bit out of shape/work habit for these sorts of things. It’s been a bit since I’ve been in the trade and jockeying a computer just hasn’t kept my physical prowess up where it should. THAT will change. Projects I’ve got in plenty!
Next, I’ll be hooking current wiring (required circuits only) into the new breaker box and removing the scattered fuseboxes from the wall. I expect this to take several hours, as I need to sort out what’s what in the mess. Some circuits are dead, some are live but I’ve no idea what they feed, some are unsafe, etc.
Once all that’s sorted out we’ll then have the service provider swap service risers so I can remove the rest of the old equipment.
..continued


