Yeah…the year is fading away quickly. I looked at the calendar and said something like, “August! What the heck? GHAAAAAAAAAAA!”
Anyway, “Getting near the end of the year” triggered some sort of “I’ve got to get this done” reflex…
That “reflex” conspired with my brain to schedule this last weekend for me to tear out the bad utility room wall and replace it, complete with moving the window and framing in for the new French doors (which involves a deck as well).
Heh…yeah…a “minor” project to be sure…
Of course my brain forgot one key thing.
August.
In Texas.
It’s still HOT! Duh!
Even if you’re used to the heat, an hour’s work time outside in the heat (and famous east Texas humidity) means some mandatory time inside recovering from the heat. There’s a really valid reason for siesta’s!
Thus, when your brain conspires to fry you to carbonized fiddly-bits with a massive project in the heat, you will get less than half of what you expect to, done. Ah well.
We are working on the utility room. It’s the first “major” piece, as when done, gets us a somewhat kitchen-y place (it will have a counter and sink), laundry facilities, and most importantly, the new hot water heater and plumbing manifold. The old water heater MUST go for a variety of reasons, not the least of which is it’s trying to kill me. Anyway, even though the house is currently habitable, we may be moving into it “sooner rather than later” and the infrastructure really needed to be further along.
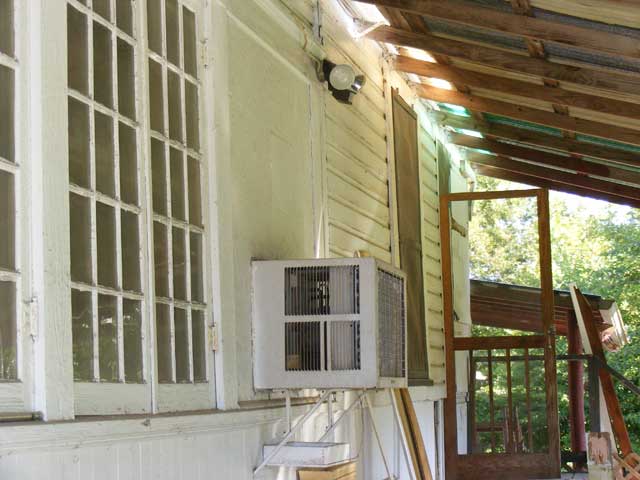
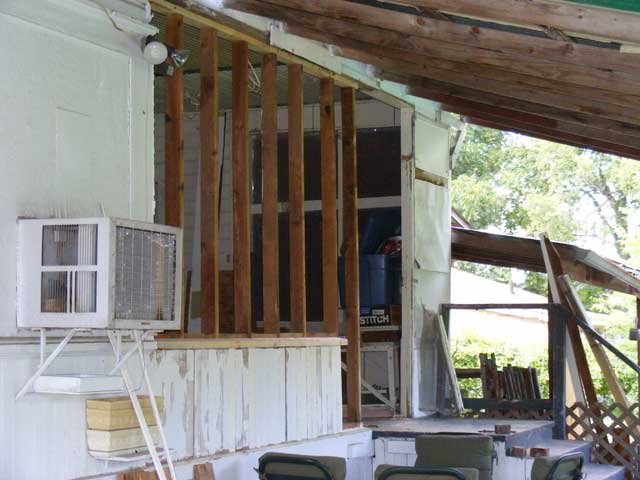
Soooo…this is the outside…the entire wall past the air-conditioner (which will go away later in favor of the original window), is a badly modified screened in porch. The wall leaks water, is unstable, and is not suitable for bearing the load required of it. It was simply put together a little haphazardly. Since I’m moving the window to the corner (where the screen door is now) and the door around the corner (a pair of French doors goes in there), it was simply time to rebuild it. The intent here on the exterior is to match the sunporch for the bottom detail, and then we’ll put fishscale up top for some character.
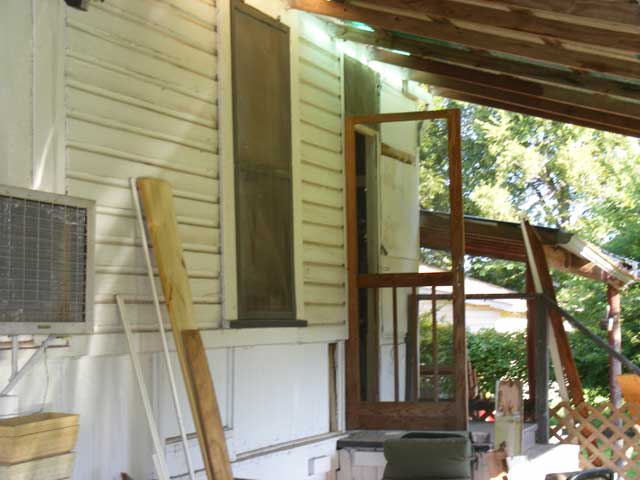
Here’s a closer view…everything with the horizontal siding to the corner needs rebuilt. If you look closely, you can see it bulging out a bit…at the junction between the horizontal siding and the vertical stuff below.
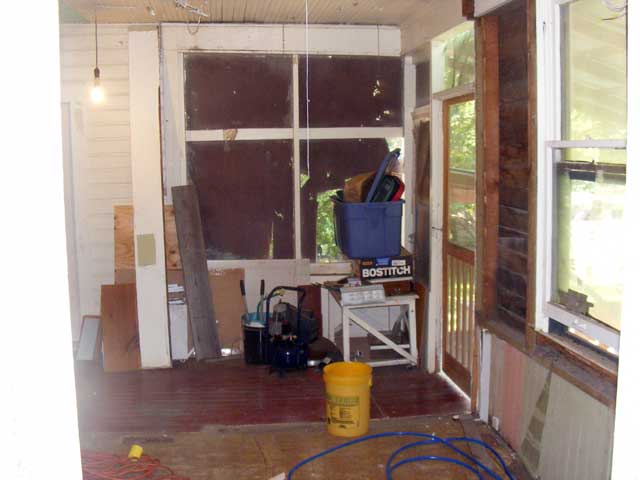
Here is the inside, facing the same direction. You can see the window, which will move, and the single screen door, which will go away. Directly ahead is where the double French doors are going in.
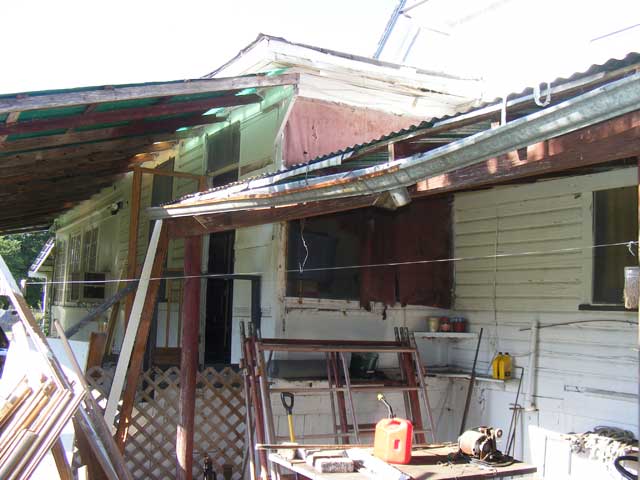
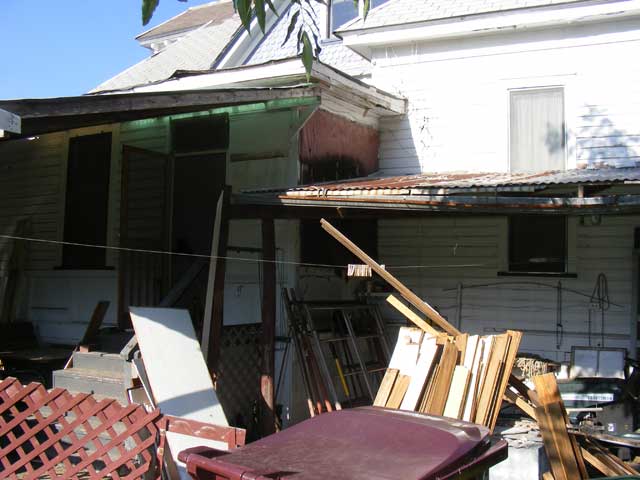
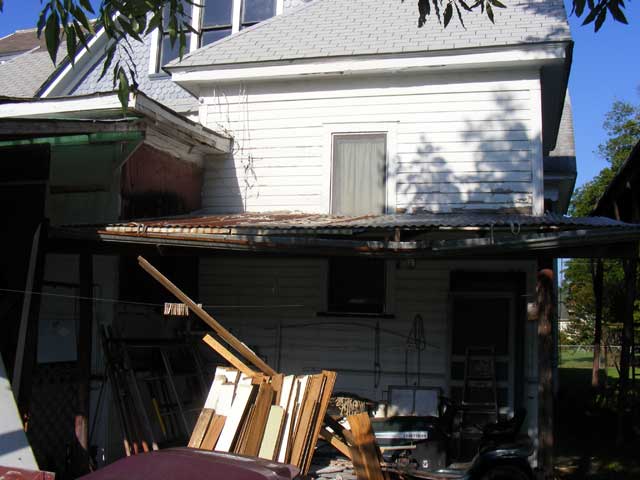
Annnnnnnd here is the mess that is the outside of that corner. The shed thing will go away and a deck/stair will go in the corner for the french doors.
Gad…what a mess this thing is. This area will look SOOO much better with this thing gone.
It’s ruining the side of the house above it too…flashing’s not right etc.
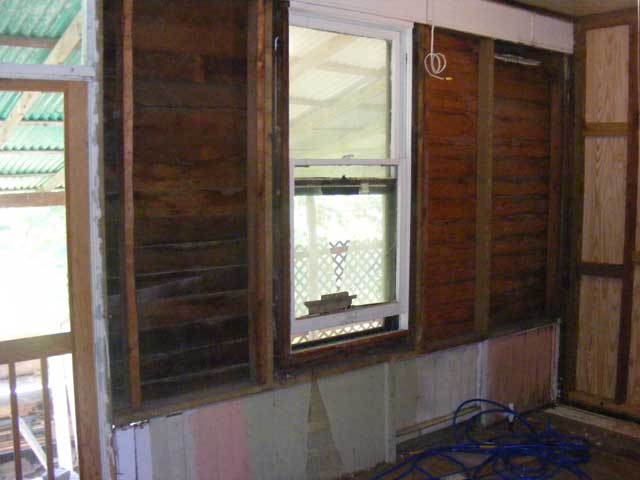
Inside again…the wall in question. Yes, we’re saving the window. It’s moving to the corner by the door. That wall will be cabinets and the washer and dryer.
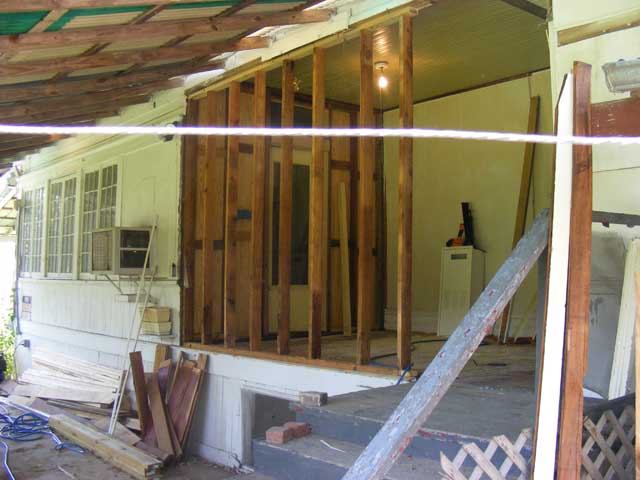
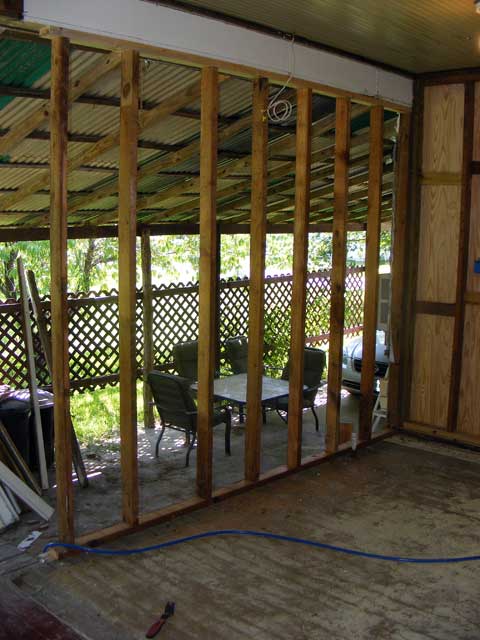
Here we are…old wall gone, new framing in place. There are some pictures (somewhere) with no wall in place and only my rickety supports holding up the roof…but I think they are on the wife’s camera. I couldn’t bring myself to stop work for any reason whilst it was so unsupported.
The really observant of you may notice a spacing difference on one set of studs…before emailing me about my sloppy framing work, please know this is to accommodate the flush mount in-the-wall tank-less water heater cabinet, which you can see leaning against the inside wall in the above picture.
From the inside
And here is as far as I got this weekend. The lower siding is on, which is vertical 1×3 tongue and groove, and matches the sunroom exterior lower wall as I intended. It breaks right where it currently ends (for the water heater cabinet again) and then will continue on to the corner and under the window. That top rail was a difficult cut! It lacks one piece of trim to match completely (a fancy quarter-round), well, that and primer and paint will make it look ever-so-much-better.
More to do…the upper will be sheathed in plywood, and then covered with fish-scale cedar shakes to match the way the front of the house is done and add some character to an otherwise boring wall. I have to frame from the end of my new wall to the corner (currently left out because we need that door/stair space for egress at the moment), and I have to frame up the French doors around the corner (before I frame that last section).
And just for those that may be curious…there are only two pieces of “new” wood in the entire construction. I reclaimed the rest from the tear out of this and other added things as we’ve gone along.
I know it looks a mess now…but there really is a plan. It’ll all come together soon! More next weekend!
I SOOO look forward to the day when things start looking better!
CUAgain,
Daniel Meyer


Pingback: The Old Victorian » Utility room wall progress…